Thanksgiving Placemat
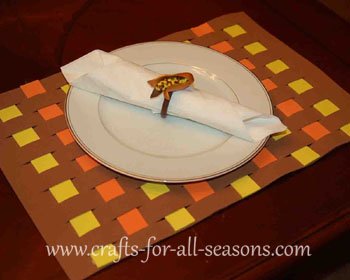
This Thanksgiving placemat is made using Foamie sheets. The great thing about them is the surface can be wiped clean with a damp cloth.
They look very nice and the colors can be matched to any décor. These can also be made using construction paper, and the finished place mat could be laminated or covered in protective clear contact paper.
This is also a great craft for children since the weaving will give them practice with hand coordination.
Materials Needed:
- At least two sheets of 12 x 18 inch Foamie sheets (I used 2 mM thickness). Here I used three sheets, one brown, yellow, and orange. You can use as many colors as you wish.
- A ruler
- A pen
- A craft knife or Exacto blade
- Scissors
- Glue
Thanksgiving Placemat Instructions:
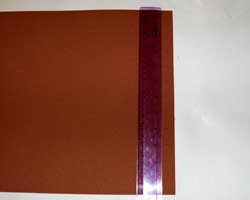
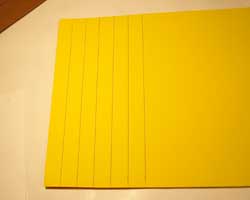
1. Begin by choosing one color of Foamie sheet that will be the base color. I chose brown in this example. Take this sheet and mark off 1 inch measurements down the short 12 inch side of the sheet. Make these marks one inch from the edge. Also mark off 1 inch sections on the opposite edge, one inch from the edge. Then, use a long straight edge to connect the markings to make straight line. You should have twelve one inch wide horizontal lines marked on your sheet, with a one inch border on all the sides of the 12 x 18 inch rectangle.
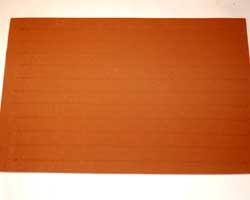
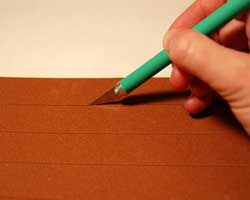
2. Using a craft knife or Exacto blade, gently pierce the Foamie sheet along the lines. You can continue to make the cut along the line using the blade, or switch to using scissors. Remember to not cut all the way through, you want to leave a one inch border on either side of the place mat.
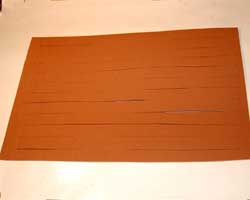
3. Continue with the Thanksgiving placemat by measuring and cutting one inch vertical strips (12 inches long) from your other colors of Foamie board. Here I used yellow and orange. If you are using two other colors like I used, you will need 5 strips of one color and 4 strips of another color. Cut these out.
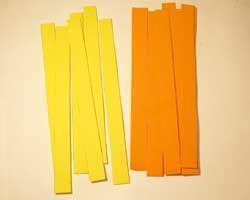
4. Begin weaving the strips through the base of the place mat. Go over one strip, and under another strip. Weave the entire strip in. When it is weaved in, gently push it all the way to the edge of the place mat, as flush as you can with the beginning of the cuts. Then, secure each edge to the base with a little bit of glue.
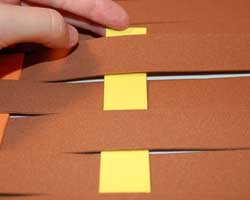
5. Now begin weaving a strip of the opposite color (in this case, orange) through the base strips. Alternate the opposite from the yellow strip… going under first instead of over. Then push it next to the first yellow strip. It will not touch the yellow strip, but will be about one half inch to one inch away. Then secure the ends of the strip with glue. Continue weaving strips like this, alternating colors.
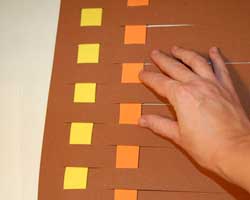
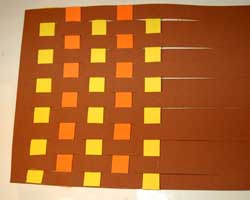
6. When you reach the last two strips to weave in, it is best not to glue them down right away. Wait until you have them weaved in, then move them around left or right until the placement and spacing between them look right, then glue to secure. Your Thanksgiving place mats are ready to use. They can be wiped clean with a damp cloth after use.
Would you consider a small donation?
You will receive my craft ebook as a thank you!
Every little bit helps! If you are enjoying this site, would you consider making a small donation? I use the extra money to help with the cost of craft supplies! With any $5.00 donation or more, you will receive my 650 page ebook full of 178 craft tutorials from this site. Thank you for your consideration!
Click here to learn more about the book, and to make a donation.
Home › Thanksgiving Day Crafts › Thanksgiving Placemat
Home › Crafts for Preschoolers › Thanksgiving Placemat
Home › Crafts for School Age Kids › Thanksgiving Placemat
Home › Crafts for Teens › Thanksgiving Placemat


