Christmas Tree Beaded Safety Pin
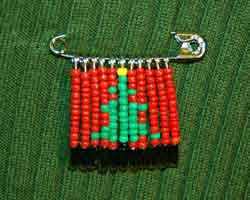
This Christmas tree beaded safety pin is a cute design that is perfect for the holidays!
Pin this to the outside of your coat and you will always be in the Christmas spirit!
Just follow the instructions below, but if you have never made a beaded safety pin before, I suggest you read my Tips and Techniques page before beginning (a new window will open).
If you find you enjoy this type of craft, there are plenty other patterns I have on this site for other seasons. Here are some quick links to them: Valentine's Day, St. Patrick's Day, Easter, Fourth of July, Halloween, and Christmas.
Materials Needed:
- Thirteen size 2 safety pins
- One size 3 safety pin
- Seed beads in red, green, one yellow or gold, and two black or brown. The size I used was 11/0 (1.8 mm long)
- Flat headed screwdriver
- Pliers
Instructions for Christmas Tree Beaded Safety Pin:
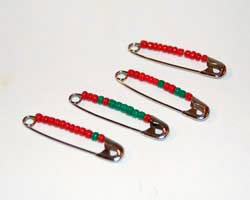
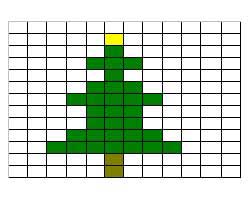
1. Begin your Christmas tree beaded safety pin by following the bead pattern shown on the right. (Note: if you would like to print out the pattern, click here and Adobe Reader will open up a new window for you). Each column on the pattern represents one of the size 2 safety pins, with beads threaded on it. Begin with the color on the top of the pattern, and thread that bead on the safety pin first. You may find some beads have an opening that is too small for the pin, but most should fit. When you are finished loading the beads, close each pin. Continue with each pin, following the pattern. Below the pattern photo is a text version of the pattern in case you cannot see the photo. The pattern shows a white background, but I chose to use red beads for the background.
Text Version of
Pattern:
Pins are going left to right; the bead order is the top bead first and moving down the pattern, the same way you would thread it on to the pin.
Pin 1: 13 red
Pin 2: 13 red
Pin 3: 10 red, 1 green, 2 red
Pin 4: 6 red, 1 green, 2 red, 2 green, 2 red
Pin 5: 3 red, 1 green, 1 red, 6 green, 2 red
Pin 6: 1 red, 1 yellow or gold, 9 green, 2 brown or black
Pin 7: 3 red, 1 green, 1 red, 6 green, 2 red
Pin 8: 6 red, 1 green, 2 red, 2 green, 2 red
Pin 9: 10 red, 1 green, 2 red
Pin
10: 13 red
Pin 11: 13 red
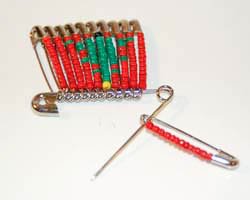
2. Take your large #3 safety pin, and open it. Using a flat
head screwdriver, wedge the flat head in between the safety pin loop at
the bottom of the pin. Once inserted, twist the screwdriver to pry the
loop open a little, as shown. The goal is to be able to have enough
room to allow each #2 safety pin to be threaded through this loop to
the other side.


3. Thread each #2 safety pin's loop onto the big safety pin. Thread it
around the large pin's loop to get it onto the other side of the pin.
This way, when you wear the pin, none of the pins will slide
off. You may need to experiment with the small safety pin
orientation at first, but once you get the hang of it you will be
putting on the safety pins in the right direction and order easily.
When you are all done, use some pliers to scrunch down the big safety
pin's loop tight again.
4. You are now ready to wear your Christmas tree beaded safety pin!
Would you consider a small donation?
You will receive my craft ebook as a thank you!
Every little bit helps! If you are enjoying this site, would you consider making a small donation? I use the extra money to help with the cost of craft supplies! With any $5.00 donation or more, you will receive my 650 page ebook full of 178 craft tutorials from this site. Thank you for your consideration!
Click here to learn more about the book, and to make a donation.
Home › Safety Pin Crafts › Christmas Tree Beaded Safety Pin
