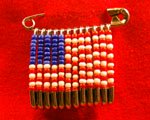
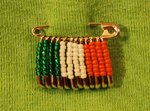
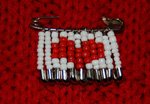
Helpful Tips for Making Beaded Safety Pins
Making beaded safety pins? If you have never made them before, this is a great place to start to get some helpful advice.
They are easy to make, but there are a few problems you may run into. If you know these things in advance, your first project will go much easily.
Making beaded safety pins are really fun, and you can use your creativity to come up with endless designs. A great way to make a design is to try it out first on a spreadsheet program, like Excel. If you do not have this type of software, graph paper will work very well too. Make sure you make your design on paper or the computer first before beginning. It will save you a lot of time threading on beads, only to have to remove them because the spacing wasn't right.
When making beaded safety pins, a good rule of thumb is that simple designs turn out the best. The pins do not always lay perfectly flat on your shirt or sweater, and they may wiggle around when you walk, etc. Therefore the more simple designs will look the best more often. But I know how tempting it is to try out some more complicated ones, so knock yourself out!
TIP 1:
A good way to open the large safety pin, the one you thread
the smaller ones on to, is to open up the pin first. Then,
firmly grasp each side of the pin in each hand and twist them and pull
apart at the same time. You can usually get the loop open
this way without even prying it open with a screwdriver.
TIP 2: One thing that is very frustrating is that "all seed beads were not created equal". Some will even have holes that are too skinny to fit on your safety pin! Keep searching around in your package of beads for another one with a bigger hole. I find that it is only a small percentage of beads per package that have tiny holes. Keep those beads for another purpose.

The beads will also differ in their width, which can affect your final
design. If you use a skinnier bead on one pin, try to use
another skinny bead in that spot on the next pin, so the design lines
up. Of course, this does not matter if you are threading all
the same color beads on one pin. You can use fat ones or skinny ones,
it doesn't matter. When I am threading a safety pin that is
all the same color, I actually try to search out for "fatter" beads and
use them up on this pin.
TIP 3:
The patterns are only to be used as a guide. Make
adjustments to your project as necessary. You may find that
when you get to the end of the pin, you can't fit on the last bead.
Don't worry, leave it off. Usually it is just a background
bead anyway (like white). Or, if it is important to the
design, eliminate another bead within the pattern to make it fit.
Or, you can try to find skinnier beads to replace with some
of the fatter ones.
I hope
this helps eliminate some frustration you may have when you first try
out a beaded safety pin project!
Here are
helpful links for all the different beaded safety pin patterns on this
website:
Valentine's
Day
Would you consider a small donation?
You will receive my craft ebook as a thank you!
Every little bit helps! If you are enjoying this site, would you consider making a small donation? I use the extra money to help with the cost of craft supplies! With any $5.00 donation or more, you will receive my 650 page ebook full of 178 craft tutorials from this site. Thank you for your consideration!
Click here to learn more about the book, and to make a donation.


