Christmas Wood Craft
Wood Craft Projects
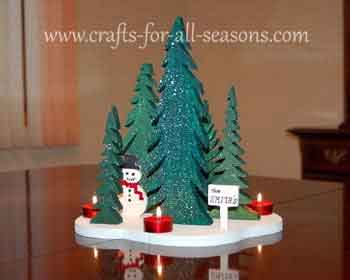
Here's a Christmas wood craft which really turns out beautiful. If you enjoy working with wood, and own a band saw, this wood project is for you.
This craft comes from my talented mother-in-law, who pre-cut all these shapes for me. I do not own a band saw myself, so I was not able to post all the step by step photos that I usually do, but my hope is that by looking at these pictures you will get some inspiration to try this on your own, and end up with a very unique display.
Materials Needed for this Wood Craft Project:
- 1/2 inch scrap pieces of wood
- 1/4 inch scrap pieces of wood
- paints and paintbrush
- 3 tea lights (or as many as desired)
- wood glue
- band saw
Instructions for this Christmas Wood Craft:
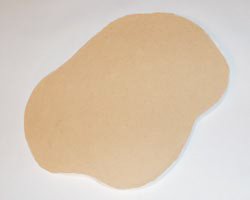
1. Begin this Christmas wood craft by cutting out a base with the band saw, using the 1/2 inch thich wood. Make the base any size you choose. ;Oval, irregular shapes work best. Then, paint the base white like snow and allow it to dry. ;A comment was submitted (see below) that asked if a pattern was available. I have included a PDF file for you to use if you like. You will need to enlarge it on a copier to fit your taste on how large you want the finished piece to be. Don't feel like you have to use the pattern, because the whimsical feel of this project is because the trees were cut free-hand. Click here to open the pattern: wood pattern.
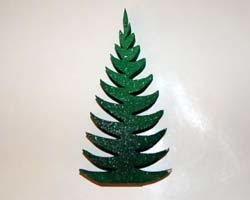
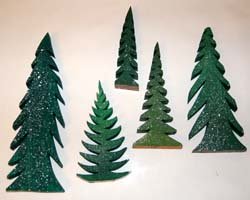
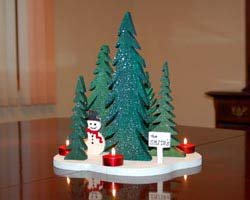
2. Next, cut out triangles for the trees, using the 1/2 inch thick wood. Once you have the triangles cut, work with each one, cutting out notches for the branches. Below are examples of the trees. Make a few different sizes, then paint them green. They came be decorated by splattering white paint on them, to look like snow, as shown here. Some could also be decorated with ornaments. This can easily be done by dipping the blunt end of a paint brush (or a cotton swab) into colorful paints and making "dots" on the tree. Trees could also be decorated using glitter or sequins. Get creative! This is the fun part.
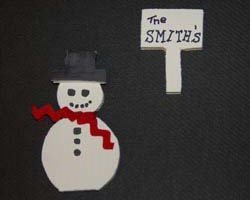
3. The 1/4 inch thick wood can be used to make accessories to the winter scene. Here a snowman and a little sign was cut out of the wood and painted.
4. Next, assemble all the trees on top of the wooden base, and secure with wood glue. Allow this to dry well overnight. Place a few tea lights around the base for a beautiful effect!
Would you consider a small donation?
You will receive my craft ebook as a thank you!
Every little bit helps! If you are enjoying this site, would you consider making a small donation? I use the extra money to help with the cost of craft supplies! With any $5.00 donation or more, you will receive my 650 page ebook full of 178 craft tutorials from this site. Thank you for your consideration!
Click here to learn more about the book, and to make a donation.
