Q-tip Turkey
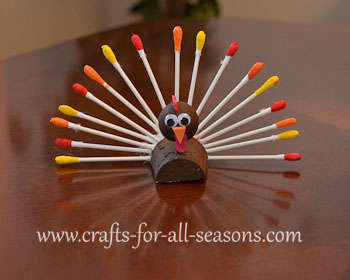
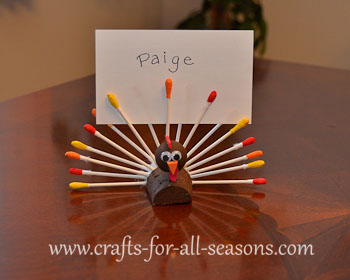
This Q-tip turkey has tail full of cotton swabs. The Q-tips are dipped into red, orange, and yellow paint to resemble colorful turkey feathers, then are fanned out and glued on the back of a cork.
This little turkey can be used as a place holder for your Thanksgiving table, because an index card fits slides perfectly in between the Q-tip feathers. This little guy would also be cute just sitting on his own, on a shelf or by your kitchen window (where mine is right now!).
This craft takes a bit of time to make because you have to allow paint to dry, and it is more geared for teenagers and adults. Kids may enjoy dipping the cotton swabs in the paint, but the rest of the steps involve a hot glue gun and some cutting.
Materials Needed to Make a Q-tip Turkey:
- 18 Q-tips (cotton swabs)
- Cork (Size #18, dimensions: 1.57 inch x 1.5 inch)
- One inch wooden ball knob
- regular white glue
- Hot glue gun and glue sticks
- brown, red, orange, and yellow acrylic paints
- paint brush
- 2 google eyes
- red tissue paper
- red and orange Foamie sheets
- scissors
- large nail
- hammer
Q-tip Turkey Instructions
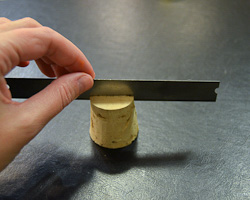
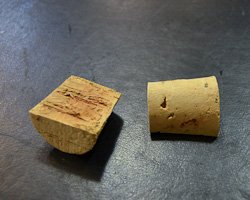
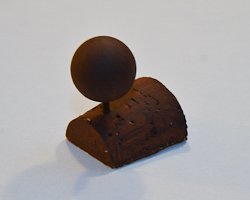
1. The first part of the Q-tip turkey project must be done by an adult. You will need to cut the cork in half lengthwise. You can use a small saw (quickest way) or a craft blade. Be very careful and take your time! You will only need one of the cork halves, and this will be the turkey's body. The flat part will be where it sits on the table.
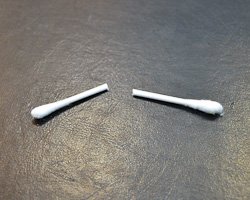
2. Cut a Q-tip in half equally. You will only need one half of the Q-tip, you can discard the other half.
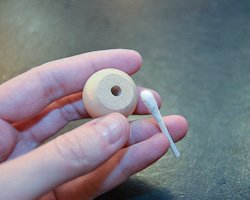
3. Place a small amount of regular white glue inside the hole on the underside of the wooden bead. Then, squeeze the cotton swab head inside the hole. It will be a nice, snug fit.
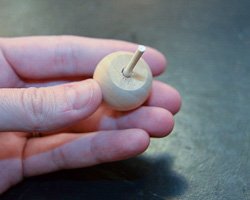
4. Next, hammer a large nail into the top of the tapered, rounded side of the cork (where the turkey's neck should be). This is to create the hole to push the stem of the Q-tip through.
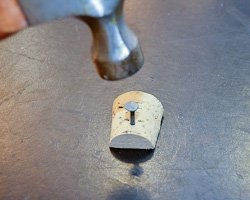
5. Put a drop of white glue in the hole of the cork you just made. Push the stem of the cotton swab with the wooden bead attached, into the hole. Again, this should be a nice, snug fit.
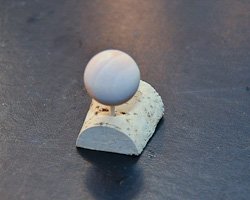
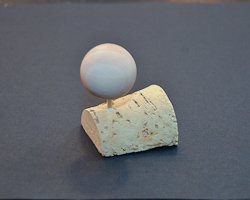
6. Paint the body of the turkey brown and allow it to dry.
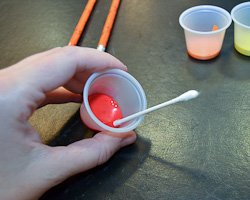
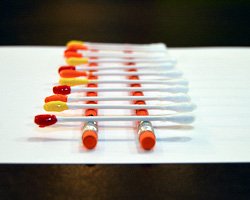
7. This is a fun part that children will like! Dip 17 cotton swabs into red, orange, and yellow paints. If you use the size cork I did, it worked out that I dipped 6 red, 6 yellow, and 5 orange. Dip each swab, but be careful to try to keep the paint only on the soft end. Squeeze off the excess paint from the tip by gently rolling the Q-tip head against the plate cup or a piece of paper. Resting the Q-tips on two pencils is a nice way to have them dry.
8. After the cotton swabs are completely dry, heat up your hot glue gun. Place some hot glue on the white end of a red cotton swab, and glue as the last feather on the cork (see photo). On the opposite side glue a yellow feather.
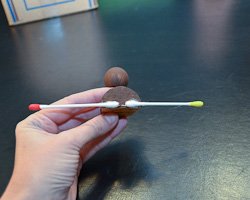
9. Continue gluing on the cotton swabs, alternating colors: red, orange, yellow. You will have 9 cotton swabs on this layer. You'll have to be careful to squeeze them all in. Try fanning out the cotton swabs on the table first to be sure of your pattern and how many will fit before gluing. Be careful of that hot glue!
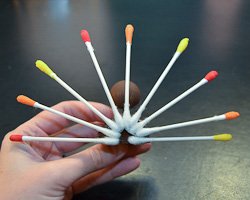
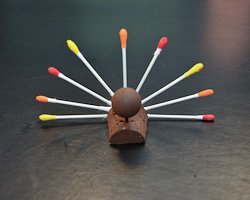
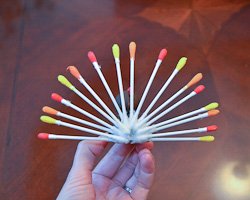
10. To make the tail fuller, glue on another layer of 8 cotton swabs now. This set of cotton swabs will be glued OVER the original set, and each new swab will be nestled in between the two cotton swab heads below it. Choose the alternating color to go in between. Use the photos as guidance.
11. You can get really creative on the Q-tip turkey's face. I glued on two googly eyes. I cut out a small waddle using red tissue paper and glued that on, and covered it slightly by gluing on a orange triangle cut from Foamie sheets (the turkey's beak). I also cut a curved head piece out of a red Foamie sheet and hot glued this on top of the turkey's head.
Would you consider a small donation?
You will receive my craft ebook as a thank you!
Every little bit helps! If you are enjoying this site, would you consider making a small donation? I use the extra money to help with the cost of craft supplies! With any $5.00 donation or more, you will receive my 650 page ebook full of 178 craft tutorials from this site. Thank you for your consideration!
Click here to learn more about the book, and to make a donation.
Home › Thanksgiving Crafts › Q-tip Turkey
Home › Crafts for School Age Kids › Q-tip Turkey
Home › Crafts for Teens › Q-tip Turkey


