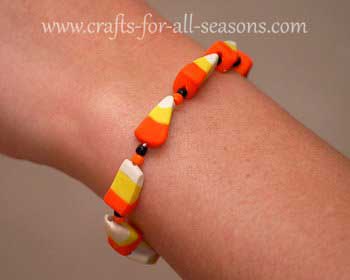
Candy Corn Bracelet
Candy Corn Polymer Clay Cane
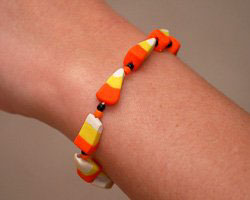
This candy corn bracelet is made from a polymer clay cane. It is very simple to make, even if you don't know the first thing about polymer clay!
This complete project tutorial will show you, step by step, how to create the candy corn beads.
The beads can then be threaded on to elastic cord to make a bracelet. You can also use the beads to make a necklace or earrings.
This Halloween jewelry looks great, and children especially love them!
Materials Needed:
- yellow polymer clay
- orange polymer clay
- white polymer clay
- blade for cutting the clay
- oven for baking the clay
- long needle to make the holes in the clay
- elastic cording and seed beads (if you would want to make the bracelet)
- eye pin, seed beads, and french hook earring finding (if you want to make the earrings)
Instructions:
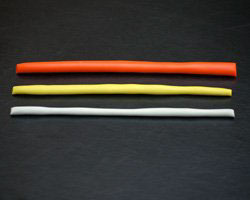
1. If you have never worked with polymer clay before, consider reading my Working with Polymer Clay article before you begin. It is full of helpful hints for the beginner. Begin the candy corn bracelet by conditioning the clay well. Then, roll the clay into three snakes of varying sizes. Make the orange snake the largest, the yellow snake the next largest, and the white snack the smallest. There is no exact sizing here. You can make the snakes skinnier later if you wish (which will result in smaller beads). The longer the clay snakes are, the more beads you can make. The size I made created enough beads for six bracelets!
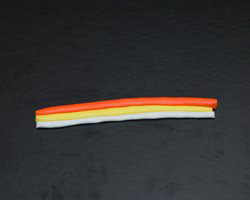
2. Next, place the rolls right next to one another on a flat surface. Begin with orange, then yellow, then white. Squeeze the rolls together slightly.
3.
While the clay is still on your flat work surface, start pushing down
on the clay rolls to flatten them slightly. Do this with the
pads of your fingers or the palms of your hands. As you do
this, put more pressure on the white clay to flatten it more, and do
not apply as much pressure to the orange clay. In this way,
you are beginning to create a triangle shaped polymer clay
cane. Turn in over and do the same to the other side.
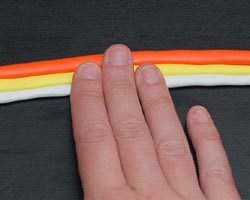
4. Now pick up your polymer clay cane. Beginning at one end of the snake, grasp the clay between both fingers and apply pressure to create a triangle (the white is the tip). Move all along the cane doing this. Try to keep the cane a uniform size.
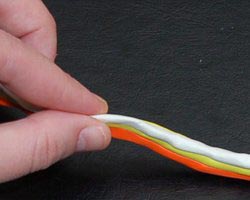
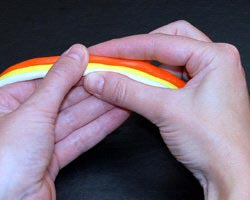
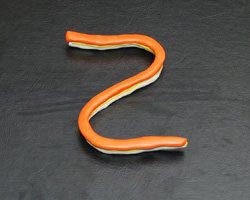
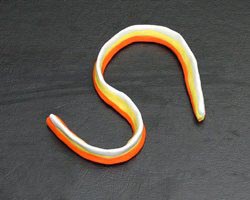
5.
Here are a few photos of what your candy corn polymer clay cane should
look like. It will come to a point at the top, and be wide at
the bottom. A cross section of this will look like a
triangular candy corn!
6.
Allow the cane to rest for awhile before slicing it. You can
place it in the refrigerator for about 10 minutes if you wish to speed
up the process. This is to allow the clay to cool off and get
a bit firmer. If the clay is warm from your hands and you try
to slice it, the candy corns may be distorted and will not retain their
shape (they'll look squished!)
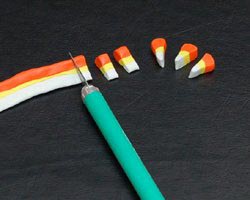
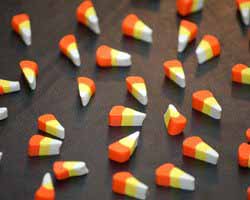
7. Using a
blade, cut off slices of clay that are about 1/4 inch thick.
8.
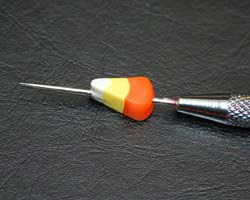
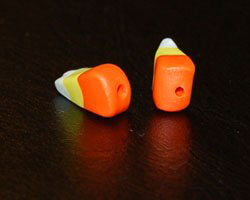
Using a thick beading needle, pierce each bead lengthwise to create a
hole that runs all the way through it. Twist the needle as
you gently push it in, so you don't change the shape of the
clay. Make sure you make the hole nice and wide.
You don't want to bake them and find out the hole is too small.
9.
Next, bake the clay in the oven according to the manufacturer's
instructions. Allow them to cool completely.
10.
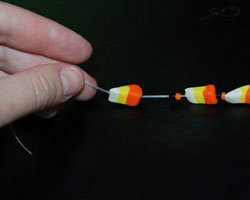
For the candy corn bracelet: Thread each beads on to a length of stretchable
elastic cording. You can also thread seed beads in
between. When the candy corn bracelet is large enough, tie off the
elastic cording with several square knots. Cut the hanging
ends of the elastic off, but not too close to the knot. Then,
apply a drop of very strong glue to the knot. I have used
super glue in the past. When it is dry, you can cut any
excess elastic a bit closer to the knot.
11.
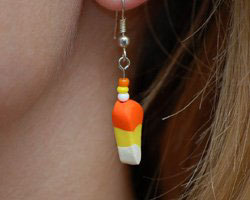
For the earrings, thread any seed beads on to an eye pin, and then add
a candy corn bead. Secure the end of the eye pin by bending
the end of it up with jewelry pliers, so the beads cannot fall
off. Then add on french hook earring findings.
Would you consider a small donation?
You will receive my craft ebook as a thank you!
Every little bit helps! If you are enjoying this site, would you consider making a small donation? I use the extra money to help with the cost of craft supplies! With any $5.00 donation or more, you will receive my 650 page ebook full of 178 craft tutorials from this site. Thank you for your consideration!
Click here to learn more about the book, and to make a donation.
