Cupcake Costume
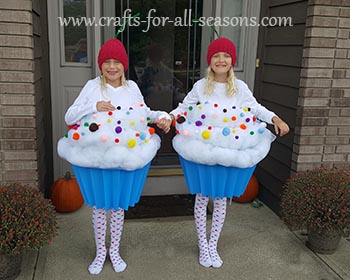
I made these cupcake costumes for my daughter Paige and her cousin Samantha for Halloween this year. It was Samantha who had the idea of a cupcake, and she wanted to go with Paige as a "cupcake duo". I started searching around for DIY ideas and I found many variations for the cupcake, but settled on this one as the easiest to pull off. I made the entire costume for $15. I was able to purchase a lot of the materials at the dollar store and Wal-Mart.
Below is the full tutorial with step by step instructions. This costume fits a child. You can also make this adult size but you will need a larger laundry basket and one or two more pieces of poster board.
If you make this costume, please email me your Halloween photos so I can post them to this project page. Thank you in advance!
Materials Needed for one Cupcake Costume:
- Small plastic laundry basket from the dollar store
- 2 yards of tulle (netting) - I bought this at Wal-Mart, and you most likely will not need the full 2 yards
- 1 bag of poly-fill (for making pillows and stuffed animals - also purchased at Wal-Mart)
- 3 pieces of poster board for the cupcake liner in color of choice (we chose blue)
- Red hat (I found these at the dollar store)
- Pom-poms in various sizes
- White ribbon
- Two green chenille stems (pipe cleaners)
- Small piece of thick cardboard
- Duct tape
- Needle and thread, or better yet, a sewing machine
- White thread
- Scissors
- Hot glue gun
- Wire cutters (optional but they will help)
- Bone folder (optional)
Other Clothing:
- White long sleeved tshirt
- Leggings or tights
- Shorts to wear underneath the cupcake
- Cute shoes
Cupcake Costume Instructions:
1. You will need something to form the structure of the cupcake costume. I was able to buy these small laundry baskets at the dollar store for $1 each. This will provide the structure for the cupcake liner. If you are making this costume for an adult, you should purchase a larger regular size laundry basket. Cut off the bottom of the basket by using scissors or wire cutters. Cut each vertical spine near the base, as shown in the photos below.
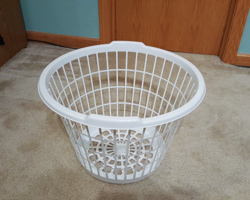
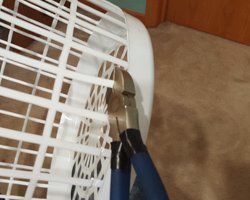
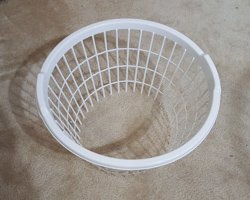
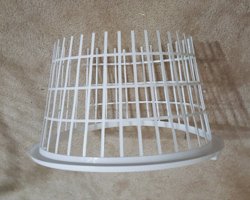
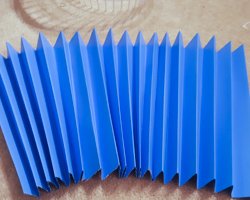
2. To create the cupcake costume liner, measure and mark off 3 inch segments along the long edge of the poster board. Begin making a fold at three inches. Make the crease sharp by using a bone folder, if you have one. Then, keeping this still folded, fold another section to the next three inch mark, but making the fold in the opposite direction. You are creating a fan, or a pleat. Continue making these folds for the whole length of the poster board.
This is a good time to figure out how high (or maybe I should say tall) you want the cupcake liner to be. This will depend of the height of your child. I cut off a good 7 inches from my poster board pleats. However, once the kids were wearing their costumes they asked me to make the liners even shorter. They said it helped them walk better by giving their legs more room to move. It was harder to make the liner shorter after being attached to the laundry basket - so I recommend figuring this out now to avoid work. Have your child step in the basket and hold up the liner pleats to it, and see what looks realistic. Make all three poster boards the same height.
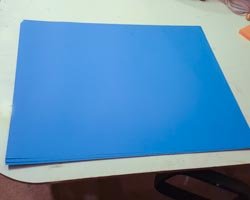
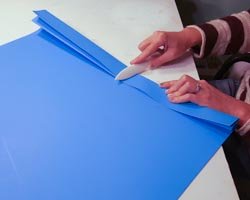
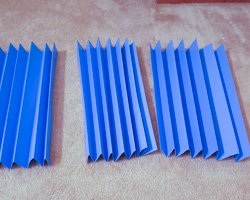
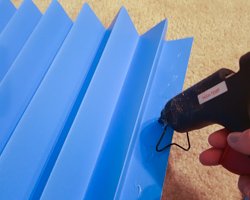
3. Hot glue the three poster board pleats to each other, by attaching one pleat edge to another pleat edge. You will have one long piece of pleated poster board that should be long enough to wrap completely around the laundry basket.
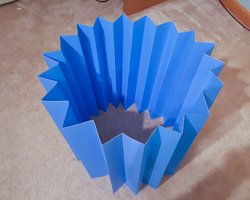
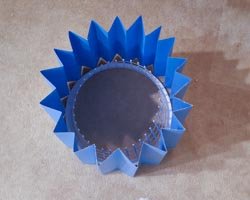
4. To attach the pleats to the laundry basket, I found the best thing that would work is good 'o duct tape. Pre-cut several three inch lengths of duct tape, but they can be cut thin (1/4 inch). Place the cupcake liner around the laundry basket loosely, then take you time and begin securing it to the cupcake liner. Take a small piece of duct tape and wrap it around the vertical spine of the laundry basket and attach it the cupcake liner. Place several of these all around the basket until the liner is securely attached to the basket.

5. Next we need to make ribbon suspenders so that the person can "wear" the cupcake costume. I had Paige and Samantha each step into their cupcake. They held the cupcake liner up with both hands, to the height they wanted the cupcake liner to sit, while I worked. I cut two long lengths of white ribbon. Then, I tied each ribbon to the laundry basket in one of the square holes, near the front of their body. I wrapped the ribbons up over their shoulders, they criss-crossed them behind their back, then tied them off in the back.
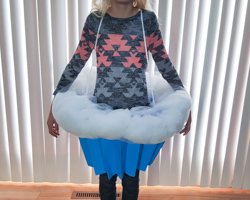
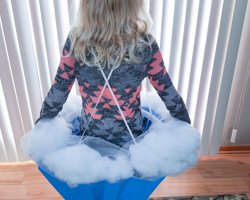
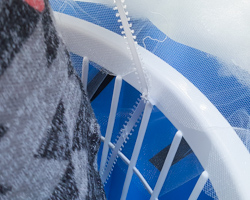
6. The next step for the cupcake costume is to create the first "roll" or "layer" of frosting. The frosting is created by stuffing a tulle tube with poly-fill. To create the first tulle tube, measure the circumference of the top of the cupcake liner and make sure you have tulle at least that long. The width of the tulle can be about two feet - but this is just an estimate. Using small pieces of duct tape once again, begin taping the tulle to the inside of the cupcake liner. The tulle is not formed into a tube yet, you are simply taping on the tulle all along the edge of the liner.
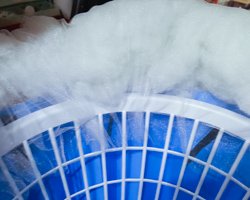
7. After the tulle is secure, prepare a needle with white thread. Grab a handful of poly-fill stuffing and place in on a section of tulle that you have taped on the liner. Fold the tulle over the mound of poly-fill, to create a tube. Secure the tulle to the other side of the tulle you have taped by sewing a few stitches. There is no need to be neat here, as these stitches will never be seen. Continue stuffing the tulle and creating a stuffed tube, sewing as you go to secure. This layer of frosting is the only one that will actually be attached to the cupcake liner.
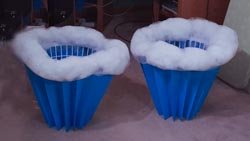
8. The next two frosting layers are tulle tubes that are stuffed with poly-fill. The child will step into the cupcake liner, raise his or her arms, and then two more frosting "inner-tubes" will be placed over them to create the look. To create the next layer, sew or hot glue a tulle tube. Make the circumference slightly smaller each time since you want to make a tapered effect. Stuff the tubes with poly-fill. You can sew the ends together, or tie them together, like I did.
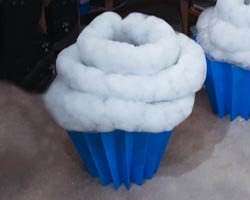
9. The final touch for the cupcake costume is to hot glue pom-poms all over the place. Actually, I just glued pom-poms on the two frosting layer "tubes" that were not attached to the costume itself. I glued large pom-poms on the second bottom layer, and small pom-poms on the top layer. Last minute, we also decided to glue pom-poms on the white shirts that the girls wore.
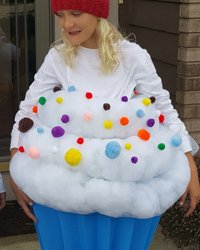
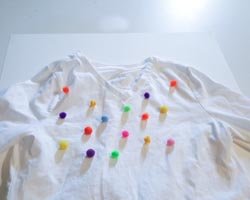
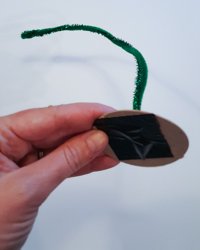
10. To make the cherry stem hat, take two green chenille stems (pipe cleaners) and twist them around each other to make them a bit thicker. Bend the end over itself to create a thicker end to the stem.
11. Cut out a 2 inch circle out of cardboard, and punch a small hole in the middle using a needle. Thread the ends of the pipe cleaner through the top of the hat (y0u may have to cut a tiny hole in the hat), and through the cardboard circle underneath the hat. The cardboard circle gives the stem a base and some support to stand upright.
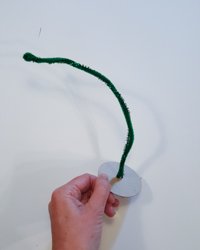
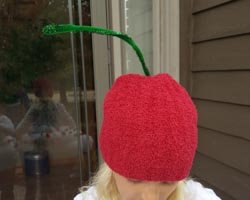
12. We completed the cupcake costumes by having the girls wear polka-dot tights, shorts underneath (that could not be seen), white shirts with the pom-poms glued on, and the red cherry stem hats! I got a lot of compliments on their costumes and they had a ball wearing them!
Would you consider a small donation?
You will receive my craft ebook as a thank you!
Every little bit helps! If you are enjoying this site, would you consider making a small donation? I use the extra money to help with the cost of craft supplies! With any $5.00 donation or more, you will receive my 650 page ebook full of 178 craft tutorials from this site. Thank you for your consideration!
Click here to learn more about the book, and to make a donation.
Home › Homemade Halloween Costumes › Cupcake Costume


