Decorated Wine Bottle
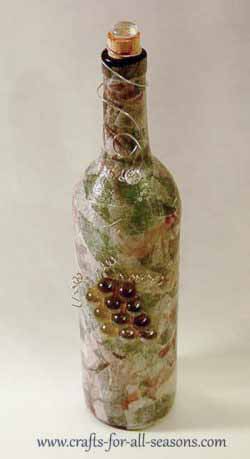
This decorated wine
bottle is made by covering it in decoupage, using patterned tissue
paper. You can also use pretty patterned napkins, or very thin wrapping paper. You will need to use decoupage medium such as Mod Podge, or you can make your own. Simply mix one part glue to one part water. Then try out the consistency with your paintbrush and add a bit of water if you would like it a little thinner.
The bottle can serve as a decoration, or can be used to hold oils, vinegars, bath soap, etc. To have it hold a liquid, simply add a top with a spout that dispenses, available at most kitchen stores.
This project offers a lot of creative possibilities. Every wine bottle you make will look different. Different looks are achieved by using different colored wine bottles (here I used green) and different tissue paper patterns to decoupage. Have fun experimenting!
Materials Needed:
- Empty wine bottle with cork
- Tissue paper (colors and designs of your choice)
- Decoupage medium (such as Mod Podge)
- Paint brush
- Green or purple marbles (sold in craft stores near the floral section)
- Flat marble stone
- 20 gauge craft wire
- Bead of choice
- Hot Glue Gun
- Razor Blade
Instructions for a Decorated Wine Bottle
1. Begin the decorated wine bottle by cleaning out a wine
bottle and removing the label as best you can. Best results
are achieved quickly if you use a razor blade to remove the label, and
then let it soak in warm soapy water. If it is a special
bottle of wine that meant a lot to you, you may choose not to
remove the label. You can then cover the wine bottle with a
very light transparent tissue paper and the label will show through.
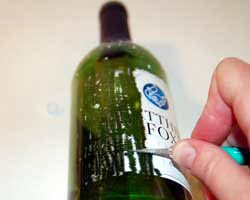
2. Take your tissue paper and rip it into a bunch of small pieces. Then, brush on some decoupage medium onto the wine bottle. Add a piece of tissue paper to the bottle, and press it down to adhere to the bottle using the paintbrush, trying to get rid of any air bubbles. Then, brush over the tissue paper you just added with more decoupage medium. Continue adding tissue paper, overlapping pieces, until the entire bottle is covered.
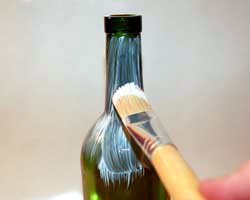
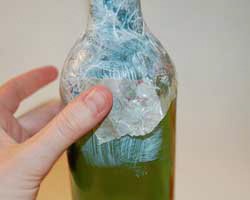
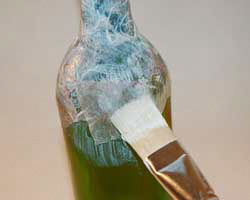
3. Allow to dry. If desired, give the entire bottle another coat of decoupage sealer. Here is what mine looked like when it was all dry:
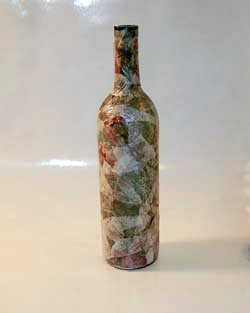
4.
Hot glue the green or purple marbles on the center of the
bottle to look like a group of grapes, as shown below. For a really strong hold, try E6000 glue instead of a hot glue gun.
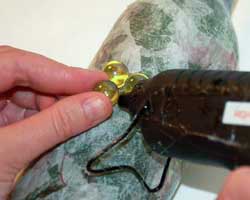
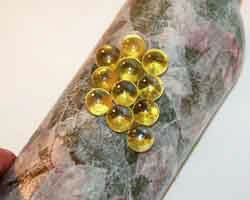
5. Next, wind a few sections of 20 gauge (or similar gauge) wire around the end of a paintbrush. Hot glue these spirals to the grape bunch to be the "vines".
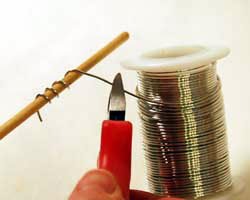
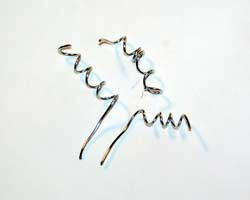
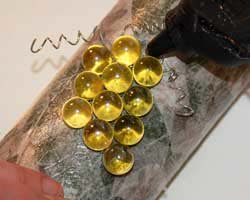
6. Next, add the cork to the top of the decorated wine bottle. If you feel it sticks up too high, you can slice it in half with a razor blade. For a decorative touch, hot glue a flat marble stone on top of the cork. Or add another decorative element of your choice.
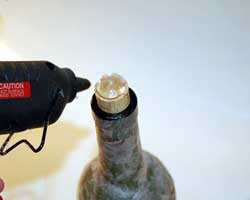
7. Wrap the 20 gauge wire around the top of the wine bottle, beginning at the very top (near the base of the cork) and wrapping it around the stem. Finish the wire by making a decorative loop. Use your creativity. The photo to the bottom left shows the shape of my finished wire. Add a fancy bead to the end of the wire, and use some pliers to bend the end of the wire up so the bead will not fall off.
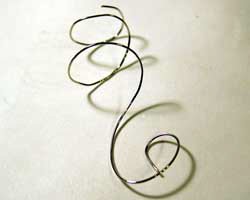
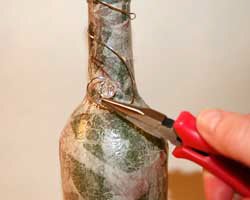
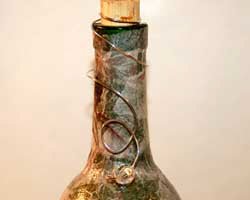
8. The decorated wine bottle is now ready to give away as a gift or enjoy for yourself!
Would you consider a small donation?
You will receive my craft ebook as a thank you!
Every little bit helps! If you are enjoying this site, would you consider making a small donation? I use the extra money to help with the cost of craft supplies! With any $5.00 donation or more, you will receive my 650 page ebook full of 178 craft tutorials from this site. Thank you for your consideration!
Click here to learn more about the book, and to make a donation.
Home › Mother's Day Crafts › Decorated Wine Bottle
Home › Crafts for Adults › Decorated Wine Bottle
Home › All Occasion Crafts › Decorated Wine Bottle
Home › Recycled Crafts › Decorated Wine Bottle


