Glass Block Turkey
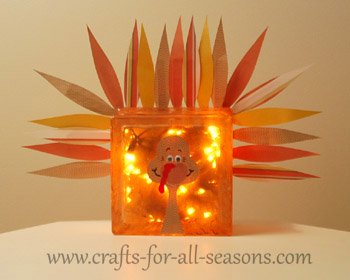
This glass block turkey is a beautiful Thanksgiving decoration you can make! It looks very pretty when it is lit up.
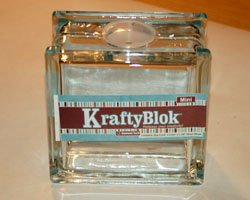
Glass blocks are sold at craft stores, specifically to be used for crafts. They come with a hole already in the bottom so you can stuff lights inside. They usually come in two sizes, 5.5 inch and 7.5 inch. Be sure to use a heat resistant glue to add the feathers. The glass block warms up after awhile when lit, so do not use a glue gun or the glue will become soft.
I used a special heat resistant glue that I found at Wal-Mart in the craft aisle for $2.50. A two-part epoxy glue would also work well. Or, try using LED lights since they do not generate much heat.
Materials Needed to Make a Glass Block Turkey:
- Small glass block, 5.5 inch x 5.5 inch
- Brown glass enamel paint
- Black acrylic paint
- Patterned scrapbook paper in coordinating fall colors
- Orange and red paper, or orange and red acrylic paints
- wooden craft sticks (popsicle sticks)
- White glue, such as Elmer's
- Heat resistant glue, such as a two part epoxy
- decoupage medium, such as Mod Podge
- 2 googly eyes
- scissors
- paint brush
- A string of orange Halloween lights (50 light strand works well)
Instructions for a Glass Block Turkey:
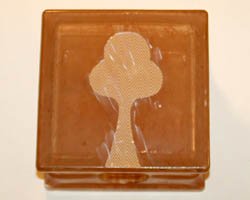
1. To begin the glass block turkey craft, clean the glass block well
and allow to dry. The glass block will be the turkey body. Paint the
entire block with brown glass enamel paint. Glass enamel paints are
sold in the 2 ounce size, right by the acrylic paints. The difference
is that they can adhere well to glass and are translucent. This means
you will see your brush strokes well. Use small strokes, as shown, to
resemble a "feathery" look. Allow this to dry completely.
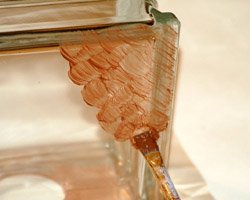
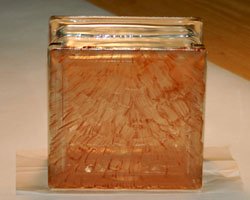
2. Cut out a turkey head from the paper of your choice. For this project, I used a pad of coordinating Fall Color scrapbook paper. All the designs are meant to go well with each other so this worked out great. You could also use solid brown cardstock. If you would like a copy of the pattern I used for the head, beak, wattle and leaves, click here. A PDF file will open in a new window.
3. Using decoupage medium (such as Mod Podge), glue the head on the
center of the glass block, using a paintbrush. Paint the top of the
head with decoupage medium. Everything will dry clear. If you do not
have decoupage medium, you can also thin out some white glue in water
to use instead.
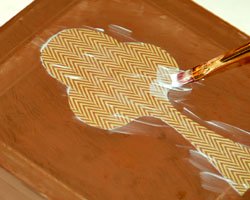
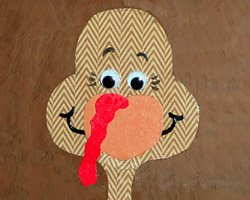
4. Next you can Add the facial features. I chose to cut out the beak
and wattle from orange and red paper, and painted on a smile with black
acrylic paint. Everything was adhered with decoupage medium (I used Mod
Podge). You could also choose to paint on the face using acrylic
paints. Either paint on some eyes, or glue on some googly eyes like I
did. Other ideas are to use a pistachio shell half as the beak, and a
small deflated red water balloon as the wattle (see the pinecone turkey craft for this idea).
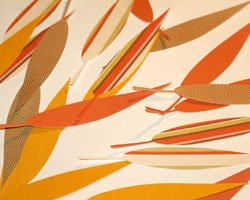
5. Now it is time to cut out the feathers. I cut out 19 feathers for a
small glass block. If you would like a pattern, click on the link in
step 2 above which will open up a PDF file for you. I cut out my
feathers using my Cricut die-cut machine. If you have a Cricut and the
Cricut DesignStudio software, I morphed the leaf from the Plantin
Schoolbook cartridge to 5 inches long by 1 inch wide. Cut these leaves
out on different patterned paper, or simply choose different fall
colors of cardstock.
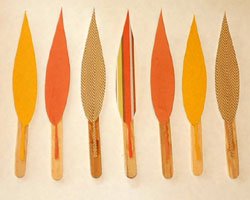
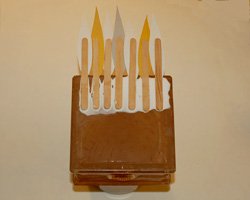
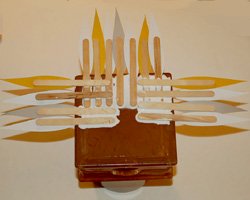
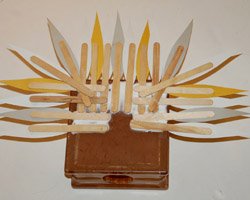
6. Glue each feather to a wooden craft stick (popsicle stick) using
regular white glue, as shown. Allow them to dry completely.
. Using a heat resistant glue, adhere each feather to the back of the glass block, as shown. I began with the feathers on the top of the glass block, then glued the feathers on each side of the block. Last, I added two feathers on each corner to complete the tail feathers. These feathers on the corners will have to overlap the other craft sticks, so use plenty of glue. Do make sure to use a heat resistant glue, and not a hot glue gun. This is because the glass block gets warm after the lights have been on awhile. You can also use a string of LED lights inside, which do not generate as much heat.
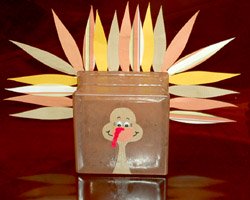
8. Take your time and stuff the string of lights inside the glass block
turkey. I used a string of 70 lights, which was tight fit but it does
look nice. A 50 strand light would probably be best. The best part is
the glass block turkey looks so cute whether it is lit or not. Enjoy!
Would you consider a small donation?
You will receive my craft ebook as a thank you!
Every little bit helps! If you are enjoying this site, would you consider making a small donation? I use the extra money to help with the cost of craft supplies! With any $5.00 donation or more, you will receive my 650 page ebook full of 178 craft tutorials from this site. Thank you for your consideration!
Click here to learn more about the book, and to make a donation.
Home › Thanksgiving Crafts › Glass Block Turkey
Home › Crafts for Adults › Glass Block Turkey


