Gourd Craft
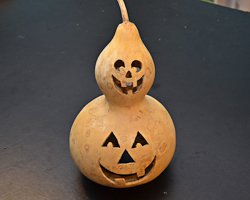
This is my first gourd craft I had tried, and I must say, I am hooked! It is amazing to me how these gourds become like wood when they dry. Since I love pumpkin carving, I suppose it is only natural for me to be drawn to gourd crafting.
Last Fall, my family visited a pumpkin patch. They had freshly picked gourds for sale, for a couple bucks each, so I picked one up. I then began to read about gourds. There are plenty of books on this subject!
There are three main families of gourds.
First, there are the small ornamental types. Those are the cute colorful ones that look great in a centerpiece or placed in a bowl.
The second type of gourds are the kind
that have a loofah inside, the same ones you use in the shower.
The third type of gourd is the kind you use for crafting. They are called the hard shell gourds (Lagenaria siceraria). When they are freshly picked, they are green and sometimes have stripes on them. When they dry, they become tan or brown. The hard shell gourds, when dry, will last thousands of years! Imagine! These are the types to make gourd crafts from.
I must give a little forewarning that this is a time consuming project, because you must allow time for the gourd to dry. This may take up to six months! I let mine dry for one year. Once dry, they become light and the shell feels like wood. They can they be carved, painted, or wood burned. Read on to learn how I made this light up jack-o-lantern duo as my first gourd craft!
Materials Needed:
- A gourd (try a farmer's market or a pumpkin patch)
- bucket
- bleach
- dish washing detergent
- Steel wool pad
- mini electric jig saw, or a Dremel with a thin drill bit (that's what I used)
- dust mask
- protective eye goggles
- disposable gloves
- Leather dye, or paint if you choose (I ended up using an orange spray paint)
- Polyurethane
- Thompson's Water Seal (if you will leave your gourd outside once decorated)
- Night bulb light on a cord (found in the craft store usually sold by the glass block crafts)
Gourd Crafting: Drying the Gourds
1. Drying the Gourds: My gourd was fresh, heavy, and green
last year when I picked it up from the pumpkin patch. To dry
it
out, find a place outside. You want to do this outside because the
gourd is actually going to begin to mold and you don't want that stuff
inside your house. You also want an area with air
circulation, so outside is the best choice. You could also
dry
these in an outdoor shed or garage.
I was worried about animals, so I chose to hang my gourd. I
did so by tying a rope around the neck and I hung this underneath our
deck. You can also dry gourds somewhere on the ground without
hanging, but you will want to have air circulation beneath them so they
don't rot too much. For instance, you could put them on an
oven rack propped up with some brick supports. If you want to
learn more about drying gourds, just do a quick Google
search. You will find loads of more information.
Drying takes anywhere from six months up to a year. I let
mine hang for one full year, until this Fall when I was ready to craft
it. You will know it is dry when the shell is hard, the gourd
is light, and you hear seeds jingling around inside!
Cleaning the Gourds - the Outside
2. Cleaning
Gourds: Cleaning the gourd takes some time
and patience. Most likely your gourd will be pretty moldy and
may have some dark spots on it. Get a bucket, large enough to
hold your gourd. Fill it with hot water, and add a squirt of
dishwashing detergent and a half a cup or so of bleach.
Allow
your gourd to soak in this solution for about an hour before you even
try to do any scrubbing; it will make your life a lot easier!
By the way, you'll have to find a way to keep the gourd submerged in
that water, it will want to pop up since it is so light. I
found something heavy and placed it over the bucket.
Using a steel wool pad, scrub the skin of the gourd. As you
do so, you will notice the first layer of waxy skin peeling
off. This is a good thing, you want to remove that first
layer. For stubborn spots, I found that using the back of a
knife to scrape it off worked great. Take your
time. If mold and the first layer of skin isn't coming off,
change your soapy water and let it soak again. I really found
letting the gourd soak for awhile makes the job a lot easier!
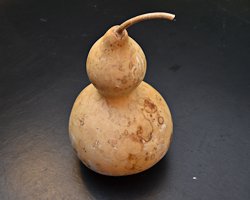
Here's what my gourd looked like when I was done scrubbing.
It still had some spots on it, as you can see. Allow your gourd to dry completely, preferably overnight.
Cleaning the Gourds - the Inside
3. Cleaning the
Inside: You need to put on some
protective equipment to clean out and carve your gourd. This
is because gourd dust is very hazardous. The dust contains
mold spores and we don't want to
inhale that. Clean and carve your gourd outside.
Where a good quality dust mask and some eye protection.
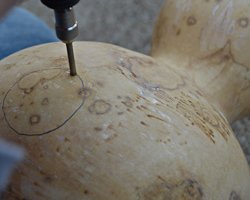
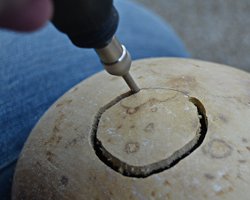
Many people use a mini jig-saw to cut and carve their gourd.
I didn't have one. But I do have a Dremel tool, and boy do I
love my Dremel. I used my tiny drill bit on my Dremel to
carve
regular pumpkins so I wanted to see how it would work on the
gourd, and it worked great. The drill bit works to make the
first hole and then you can make it cut by applying pressure to the
drill bit, moving it in the direction of the cut, and
applying an up and down see-saw motion as the same time.
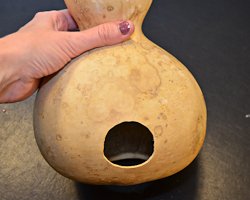
For your first cut, carve out a large hole in the bottom of the gourd.
Remove the circle you just cut and get a bag ready to
throw away the insides. You'll see the typical insides of a
squash/pumpkin, but it will be all dried out, which makes it easier to
remove. There will be seeds in there, and it will be dusty
too. Make
sure you have on that dust mask and eye protection, and it is a good
idea to have on disposable gloves too. I was able to clean my
gourd out by reaching it and pulling down all the woody threads with my
gloved hand. For the top part
of the gourd, the neck made it pretty tight to get up there with my
hand. I used a pair of needle nose pliers to get the rest
out, which worked great. I also read that gourd crafters
often use a wire hanger that they have
bent into a tool to get up in those tight spaces.
Once all cleaned out, I chose to soak my gourd in a fresh
mixture of soapy water/bleach solution again. This is to
clean and kill off any mold that was up inside. Allow to dry
overnight.
6. Now the fun part, decorating your gourd craft!
What is so nice
about gourds is their shape will help you determine what to
make. The top of mine was so round I thought it would be cute
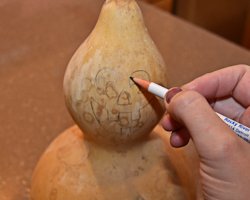
to have two pumpkins on top of one another.
I drew my pattern on with a pencil.
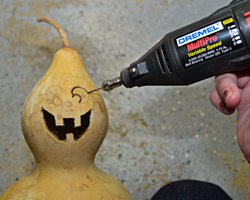
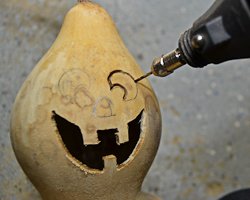
7. Using my Dremel with a small drill bit, I took my time and
carved out my pattern (I did this outside with the proper safety
equipment).
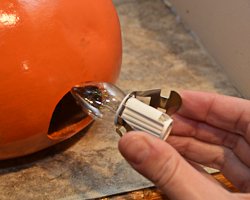
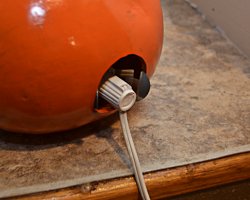
8. I also made a small hole in the back of the gourd craft for a night light bulb to fit into to.
9. After I carved it, I went over the entire gourd craft with some
light sand
paper.
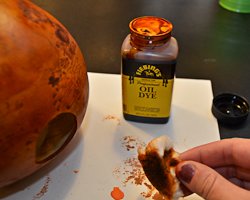
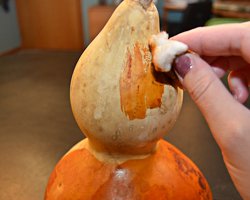
10. Next, I applied leather dye, which is very popular for
gourd crafts. This dye is very easy to use, and it stains the
gourd
but still allows the natural markings to show through. I used
a cotton ball and just dabbed it on. You could also paint
your gourd with whatever paints you choose. After I did this
however, I didn't like how the mold spots were still showing through.
The dye will work really well if you want a natural look, but
after I dyed it I ended up using an orange spray paint instead.
11. To give it a glossy finished look, I applied a
polyurethane coat. If you will display your gourd outside,
Thompson water sealer works great.
12. You can add a night light bulb in the back to light it up!

Would you consider a small donation?
You will receive my craft ebook as a thank you!
Every little bit helps! If you are enjoying this site, would you consider making a small donation? I use the extra money to help with the cost of craft supplies! With any $5.00 donation or more, you will receive my 650 page ebook full of 178 craft tutorials from this site. Thank you for your consideration!
Click here to learn more about the book, and to make a donation.
Home › Fall Crafts › Gourd Craft
Home › Halloween Crafts › Gourd Craft
Home › Crafts for Adults › Gourd Craft
