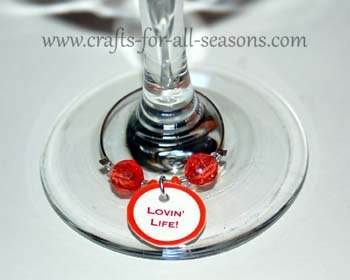
Homemade Wine Charms - with Free Printable!
Wine Crafts
Homemade wine charms make a perfect gift! These are great to give away for Mother's Day, Father's Day, or for a host/hostess gift.
What is wonderful about them is that you can make them unique for the person you are giving them to. Since these wine charms are made from shrink film, you can print any design you want on them from your computer printer.
If your mother loves birds, try printing out different species of birds, each for a wine charm. Or maybe your father is a movie buff, then you can get creative and make each wine charm have a famous quote from a movie.
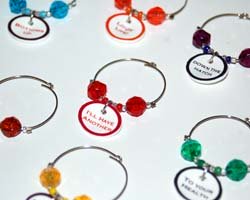
The project below shows you how to make the ones shown here, which include a festive phrase. I include a PDF file for the template so you can print these right on to the shrink film.
Materials Needed for the Homemade Wine Charms:
- Shrink film for computer printers (I found some at my local craft store. Office supply stores should have it too. It is sold near the specialty papers for printers.) You can also find this at the Crafts For All Seasons Store (see Karen's Favorites).
- Wine charm loops (Found in craft stores, usually near the jewelry and bead section). You can also find at the Crafts For All Seasons Store (see Karen's Favorites).
- 18 gauge wire
- beads of choice (I used seed beads and 8 mM faceted beads)
- crimp tubes (I used 1.3 mM size)
- Jewelry round nose pliers
- Wire cutters
- Hole punch
- computer printer
- baking sheet
- scissors
- oven
Instructions for Homemade Wine Charms
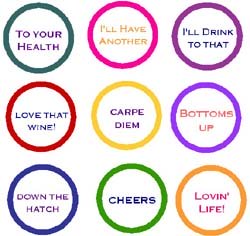
1. Begin your homemade wine charms by making your designs for the tags on your computer. If you would like to use my template, which includes 9 festive phrases ("To Your Health", "I'll Have Another", "I'll Drink to That", "Love that Wine!", "Carpe Diem", "Bottoms Up", "Down the Hatch", "Cheers", "Lovin' Life!") then click here or on the image below. A new window will open for the PDF file. Simply insert a sheet of the shrink film into your printer and print out the file. If you are designing your own, keep in mind that the shrink film usually shrinks down to about 1/3 of the original size.
2. Once your designs are printed, cut them out with scissors.
Then, punch a hole near the top of the charm with a hole
punch.
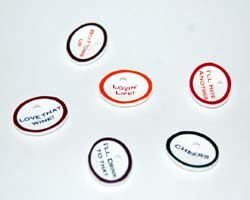
3. Place the charms on a baking sheet and bake according to
the manufacturer's instructions. It usually only takes about
1 minute for them to shrink, so watch closely. The charms
will curl up, and they are finished when they lay flat again.
Do not overcook or they could become discolored.
Remove them from the oven and allow them to cool.
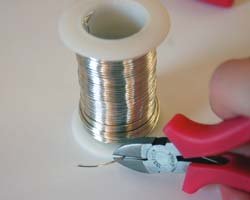
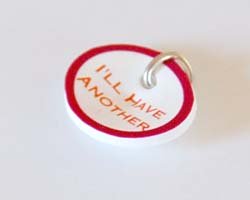
4. Next you need to create a large jump loop to connect the wine charm to the wine charm ring. You can either purchase large enough jump loops, but I find it just as easy to make my own. To do this, cut a small piece (about 1/2 inch) of 18 gauge wire, one for each wine charm.
5. Using your round nose pliers, wrap the wire about the nose of the pliers to begin to form a loop. Stop when you have a hook shape.
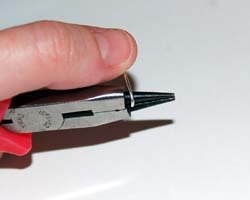
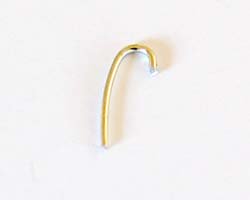
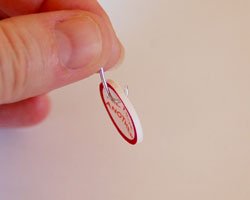
6. Thread
the hook through the wine charm hole, as shown in the first photo
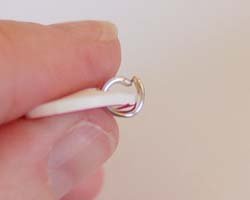
below. Then using your jewelry pliers, close off the loop and
cut off any excess. The loop should not be attached securely to your
wine charm tag.
7.
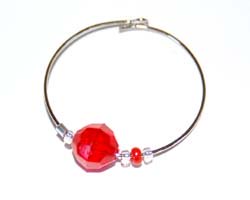
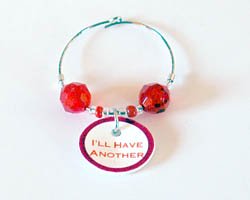
Finish the wine charms by threading on the beads.
You can really get creative here, but if you would like to
follow my pattern do this: Thread on a crimp tube, followed by a seed
bead, 8 mM faceted bead, and three seed beads (first photo below).
Then thread on the charm, and finish the sequence on the
other side.
8. To keep the beads from falling off every time the homemade
wine charm is opened to be placed on a wine glass, it is important to
use the the crimp tubes. Crimp these tight using the pliers.
These create a "stop" to keep the beads from falling off.
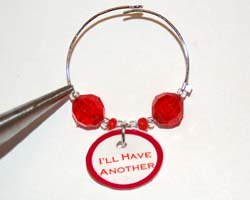
9. Your homemade wine charms are finished. Enjoy them yourself or to give away as a gift. They go perfect with a bottle of wine as a complete hostess gift.
Would you consider a small donation?
You will receive my craft ebook as a thank you!
Every little bit helps! If you are enjoying this site, would you consider making a small donation? I use the extra money to help with the cost of craft supplies! With any $5.00 donation or more, you will receive my 650 page ebook full of 178 craft tutorials from this site. Thank you for your consideration!
Click here to learn more about the book, and to make a donation.
Home › Mother's Day Crafts › Wine Charms
Home › Crafts for Adults › Wine Charms
Home › All Occasion Crafts › Wine Charms
