Valentine's Day Painted Shirts
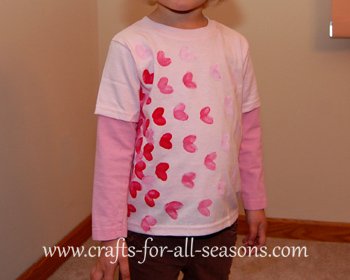
These Valentine's day painted shirts are decorated by using your fingerprints (or your child's fingerprints) to create little hearts all over the shirt.
You will need a little bottle of textile medium, or fabric paint. I prefer buying one bottle of fabric medium, because you can mix it with any color of acrylic paint you already have on hand to create fabric paint. Wonderful idea isn't it? I used red and white, and mixed them to make pink.
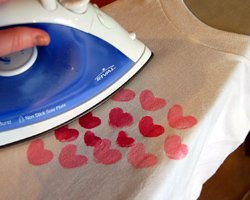
Here I show two different variations of how you can arrange all the hearts, but there are many ways to decorate the shirt. Little hearts around the neckline or sleeves would be really cute! My girls helped me make these and we had a lot of fun together. Once the paint is dry, you simply "set" the paint using a warm iron and then the paint is permanent! A very fun, inexpensive way to make some Valentine's day attire for yourself or your children.
Materials Needed for these Painted Shirts:
- Textile Medium (I used FolkArt
Plaid Textile Medium)
- Red and White acrylic paint
- Red and white fabric paint
You will also need:
- tray for mixing paint (I recycle the foam trays that come
under cuts of meat at the grocery store... I find them to be perfect
little paint palettes!) - cotton t-shirt
- cutting board, or piece of cardboard, that fits inside the shirt
- wax paper
- warm iron
Painted Shirt Instructions
1.
To begin the painted shirts, you should first launder the t-shirts,
dry, and iron them.
2. Wrap a piece of wax paper around a cutting board or a piece of
cardboard. The cardboard should be able to fit inside the
shirt,
and be big enough to lie underneath the area you are planning to
paint. This will stop any bleed-through of paint to the back
of
the shirt.
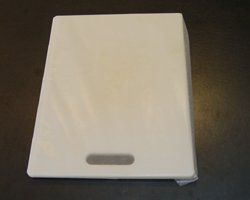
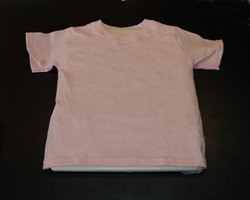
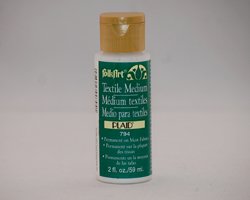
3. Once the cardboard with wax paper is placed inside the shirt, you are ready to begin. If you are using fabric paint, just dollop some out onto a mixing tray, or paper plate and you are all set. If you are using textile medium like I did, follow the instructions on the bottle for mixing. The one I used by FolkArt Plaid (see image below) and it said to mix two parts textile medium with one part paint.
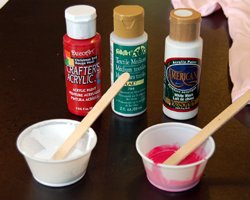
4. I highly encourage to practice making a few hearts on a piece of paper first, to get the hang of it. Press the pad of your index finger into the red paint. Press it onto the fabric at an angle, to create one side of the heart. Then, dip your finger again into the paint and overlap it with the other fingerprint, going at the opposite angle, to create the other side of the heart. You should have a nice looking heart.
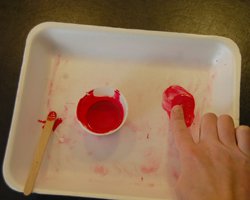


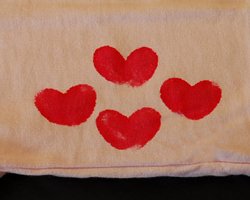
5. The patterns you choose to make are endless. For
one shirt, I used small fingerprint hearts to create a large heart in
the middle of the shirt. For this, I made pink hearts all
along
the edge of the heart, then as I got to the middle of the heart I
filled it with red hearts.

6. For the other shirt, I made hearts radiating from the left side of the shirt. I began with red hearts, and kept them close together. Then I used pink hearts as I moved towards the right side of the shirt.
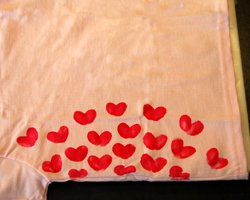
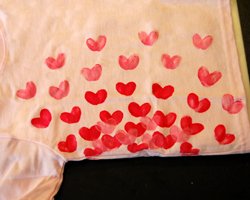
7. Allow the shirts to dry overnight.
8. Remove the cardboard from inside the shirt, and apply a
warm iron over the painted areas. This sets the paint and
makes it permanent.
9. If you make these painted shirts, please post a picture following the instructions below! We would all love to see how it comes out.

Would you consider a small donation?
You will receive my craft ebook as a thank you!
Every little bit helps! If you are enjoying this site, would you consider making a small donation? I use the extra money to help with the cost of craft supplies! With any $5.00 donation or more, you will receive my 650 page ebook full of 178 craft tutorials from this site. Thank you for your consideration!
Click here to learn more about the book, and to make a donation.
Home › Valentine's Day Crafts › Painted Shirts


