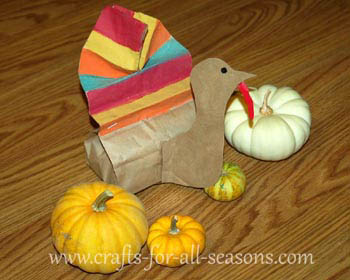
Paper Bag Turkey
Thanksgiving Crafts for Kids
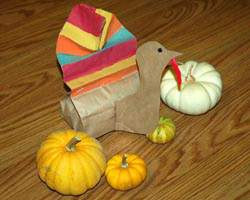
This cute paper bag turkey craft that is made out of a paper lunch bag.
It is an easy craft for kids, including preschool children who will enjoy painting the stripes on the turkey.
All that is needed is two brown paper lunch bags. This turkey craft will make a cute Thanksgiving day centerpiece, or it can be used as goodie bag.
The body of the turkey can be filled with candy or small toys to keep the young ones amused at the Thanksgiving day table.
Materials Needed:
- Two lunch size paper bags
- Scissors
- Stapler
- Tape
- Tissue paper or crumpled newspaper
- Black marker or crayon
- Paints and paintbrush
Instructions for the Paper Bag Turkey
1. Begin the paper bag turkey by folding the bottom part of the bag up. Then, turn the bag over.
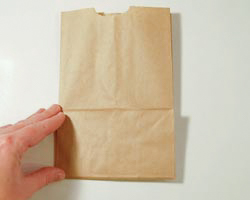
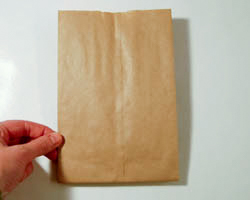
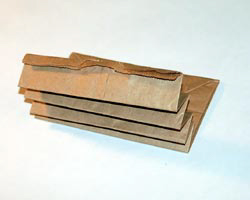
2. Next, begin to make accordion folds (about ¾ of an inch wide or so) up the rest of the bag, as shown. You can trim off any excess at the top with scissors.
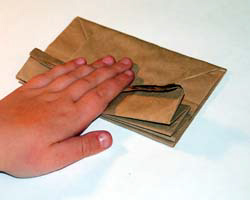
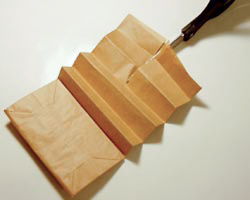
3. Unfold the bag,
and make a vertical cut with the scissors from the top of the bag, in
the center, down about 3 inches.
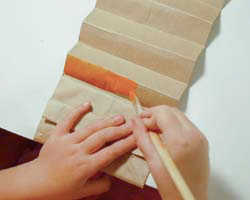
4. Paint each stripe of the accordion folds a different autumn color (such as red, orange, yellow, brown, green). Make sure the paint the back of the bag too. Allow this to dry.
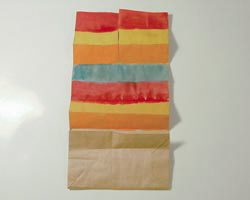
5. Stuff the bottom of the bag with a bit of tissue paper or crumpled newspaper. Or, fill it with small toys or goodies. Staple the bottom of the bag with two staples on each side.
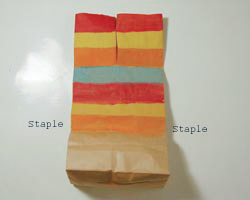
6. Bring the top edges of the bag together upon themselves, and tape this together.
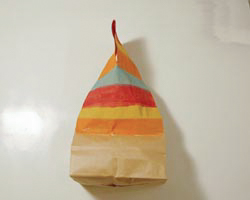
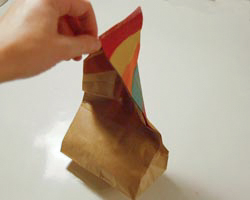
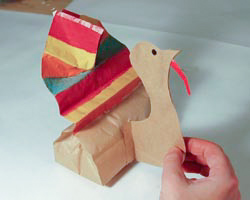
7. Shape the turkey tail as shown. Taping the top edges together forms a triangle shape. Bring this out pointing forward, and then make the folds as appropriate to fan out the tail.
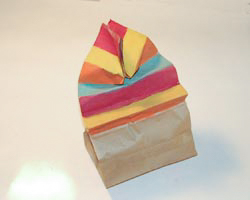
8. The next step is to draw a turkey head on another paper lunch bag, and cut out the shape. By cutting through the entire lunch bag you will have two identical shapes.
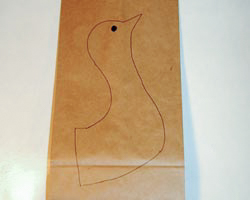
9. Glue the two sides of the head together, but first sandwich in a little gizzard (either cut from red paper or colored from the lunch bag paper). Also allow two tabs to hang free near the base of the neck, for gluing on to the body. Allow to dry.
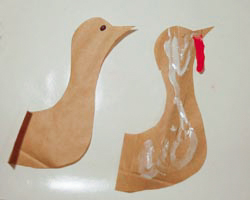
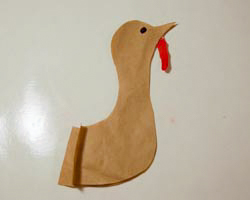
10. Glue on the head to the body by attaching the two tabs to the base of the lunch bag turkey body.
Would you consider a small donation?
You will receive my craft ebook as a thank you!
Every little bit helps! If you are enjoying this site, would you consider making a small donation? I use the extra money to help with the cost of craft supplies! With any $5.00 donation or more, you will receive my 650 page ebook full of 178 craft tutorials from this site. Thank you for your consideration!
Click here to learn more about the book, and to make a donation.
