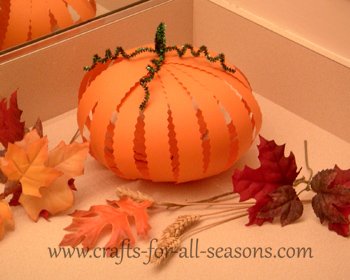
Paper Strip Pumpkin
Halloween Paper Crafts
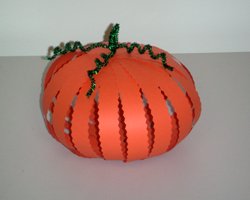
This paper strip pumpkin is made out of orange cardstock and held together with two paper brads.
Although it looks very simple, it takes a careful hand to spread all the strips out evenly and to hold them in place while attaching the paper brad.
Try decorating the paper strip pumpkins with glitter spray paint, or decorate them with sequins. They also look great if you make them out of patterned scrapbook paper.
These will look beautiful as part of a table centerpiece display or sitting on your mantle.
Materials Needed for the Paper Strip Pumpkin:
- Two 8.5 x 11 inch sheets of orange card stock
- Fancy edged scrapbooking scissors
- Clear adhesive tape
- Two paper brads (alternatively, a stapler could also be used)
- Ruler
- Pencil
- Two or three green pipecleaners
Paper Strip Pumpkin Instructions
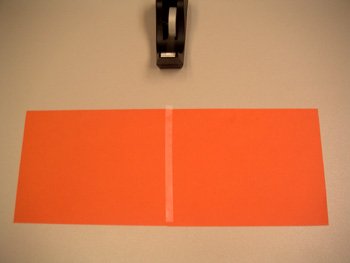
1. Begin the paper strip
pumpkin by taping the 8.5 inch edges of the
two sheets of cardstock together with clear tape.
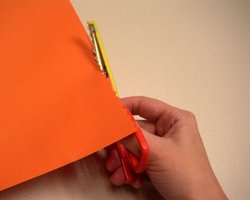
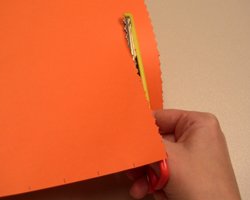
2. Cut a decorative edge with the fancy edged scissors along the two long lengths of the paper.
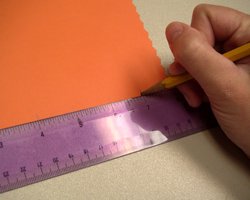
3. Measure and mark one inch increments along
one of the 8.5 inch
sides.
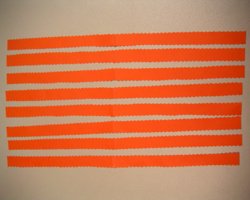
4. Fold the cardstock in half where you taped the two pieces of card stock together. Cut one inch wide strips using your marks as guides. When you are finished you will have 8 strips of paper with fancy edges.
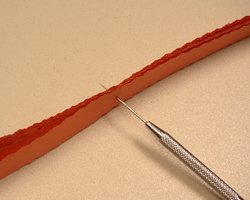
5. Stack all the strips on top of one another. Finding the middle is
very easy since you will see the tape and where the two edges meet.
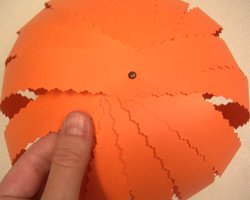
Pierce a hole in the middle of all the strips. If you are using a large
paper brad, you can use a hole punch. Alternatively, you can also
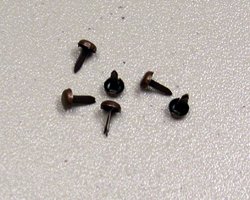
staple the stack together. Secure using a paper brad.
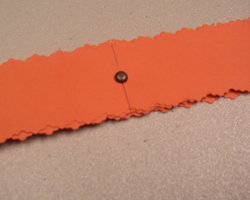
6. Fan out all the strips, in order. It is
extremely important to take
your time on this step and be accurate. If you rush through this step,
the pumpkin will not look nice and symmetrical. Begin with the top
strip, and fan it out. Take the strip right underneath it and fan it
out next to the previous strip, and so on… going in order.
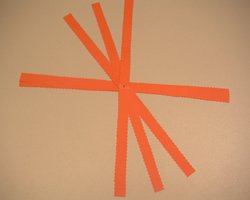
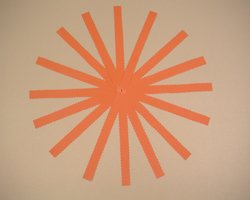
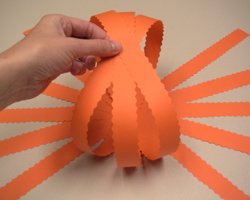
7. Next, take the strip on the top and make loop as shown.
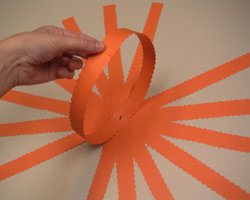
8. Continue making loops, in order. Towards the
end it gets a little
tricky holding all the strips together. Secure the tops of the strips
together with a paper brad or a stapler
9. You can make a pumpkin stem out of a pipecleaner, by folding it upon
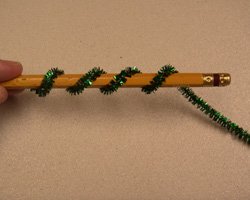
itself a few times to make it thicker. To make curly stems, wrap the
pipe cleaner around a pencil a few time. The pipecleaner stem can be
attached to the pumpkin by wrapping it around the top brad, or stapling
it to the pumpkin.
Comments from Others
Some Other Ideas...
by Laurie Powell
Michigan
"I would try using fun foam. You might even be able to
find the fun foam in larger sheets. That will omit the taping 2 smaller
sheets together.
I'm not sure without trying it, but couldn't you just stack all of the
strips on top of each other and connect each end through a hole using
the brads. Then just fan out the strips to make your circle or pumpkin.
Then when pumpkin time is over, just put it back into the stacked strips
and lay it flat to store away until next year.
You can make these circles in different colors for every holidays.
For winter use white fun foam and draw snowman faces on them or use
giggle eyes. A triangle piece of orange fun foam will make a good nose.
Use a pipe cleaner with a pompom on each end to make ear muffs.
For Christmas you could use brown fun foam and add tan pipe cleaners for
antlers, a red pompom for Rudolph's nose and some giggle eyes.
For the 4th of July make strips in red, white and blue. Then glue on
different colors of stars.
For Valentine's Day make the circle in red, pink or white and glue on
different colored heart shapes.
For St. Patrick's Day make it white with green shaped shamrocks all over
it.
Just keep going for each month! and most of all have fun making them!"
Response from Crafts For All Seasons: Great suggestions Laurie! Thank you for sharing.
Would you consider a small donation?
You will receive my craft ebook as a thank you!
Every little bit helps! If you are enjoying this site, would you consider making a small donation? I use the extra money to help with the cost of craft supplies! With any $5.00 donation or more, you will receive my 650 page ebook full of 178 craft tutorials from this site. Thank you for your consideration!
Click here to learn more about the book, and to make a donation.
