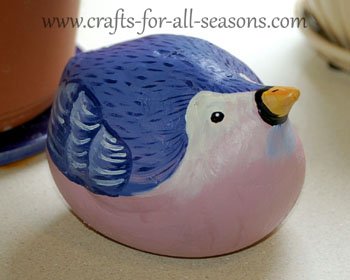
Plaster Bird Craft
Plaster of Paris Crafts
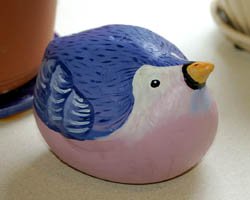
This plaster bird craft is incredibly easy to make! All you need is some Plaster of Paris, a balloon, an empty water bottle, and some paints.
I learned how to do this craft from my amazing mother-in-law, Sue Hunady. She is an art teacher and has made these birds with her high school students. Each bird comes out a little different, depending on how you pull the balloon and form the head. The bird is then painted any way you like.
She showed me an example where she painted flowers all over the bird. In this way, these birds can be made for any season of the year... you can make Christmas bird (cardinal with poinsettias, or a Halloween bird, etc.) Use your imagination!
If you are particularly good at painting you will have a great time with this craft. I imagine these plaster bird crafts would sell very well at craft shows!
Things Needed:
- Plaster
of Paris (available in craft
stores, usually sold near the clay products)
- Spoon
- Mixing container (preferable something
disposable)
- A balloon (the bigger the
balloon, the
larger the bird)
- An empty water bottle
- Paints and paintbrush
Instructions for the Plaster Bird Craft
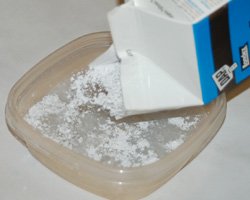
1. Begin the plaster bird craft by mixing up the Plaster of Paris with
water in a mixing container, and stir it with a spoon. Follow the
manufacturer's instructions for this (usually two parts plaster to one
part water). Be sure to follow all the printed warnings on the
container and use caution (do not mix it with your hands, use good
ventilation, etc.). I mixed up two cups of plaster to make this bird.
Two cups of plaster will fill up a 16.9 fl. oz. water bottle. This
gives you a starting point; you may not use it all. If you want to make
a small bird you can make less plaster. I did my mixing in a disposable
food container.
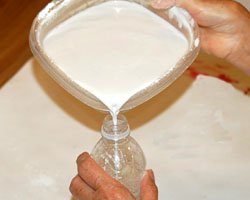
2. Once it is mixed, pour the plaster into the empty water bottle. If
necessary, you can make a paper funnel to help. Next, blow up the
balloon. Clench the opening of the balloon closed with your finger
while you position the balloon over the water bottle filled with
plaster. This part takes a little practice, but try to get the balloon
opening over the top of the opening of the water bottle without letting
too much air to escape.
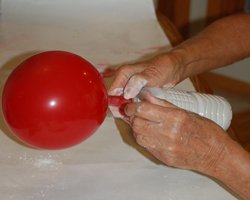
3. Now the fun part! While holding on to the opening of the balloon at ALL TIMES (so it does not pop off!), flip the entire assembly over and gently shake. Shake the plaster from the water bottle into the blown up balloon. Do this gently. Once you have a good amount of plaster in the balloon, and the bird is about the size you want it to be, release the balloon from the water bottle and gently release the rest of the air from the balloon. The balloon will tighten up all around the plaster. Make sure you don't have any air pockets.
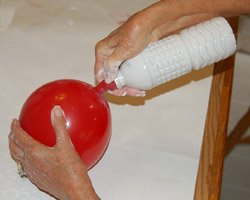
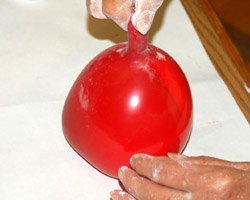
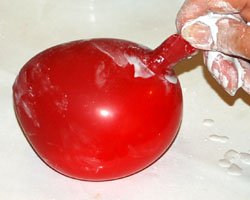
4. Now, find a strong clip (like a binder clip, or a "chip clip") and clip the end of the balloon so you don't have to sit there and keep holding it. The balloon will start to turn warm when the plaster is activating (beginning to harden). Keep checking it to see if it is getting warm and beginning to set. Some plaster will take awhile to do this (20 to 30 minutes), especially if it is old. Check the instructions on your package to see how long yours may take. Once it begins to activate and harden, you are ready for the next step, so be ready.
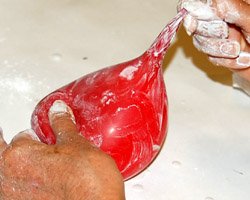
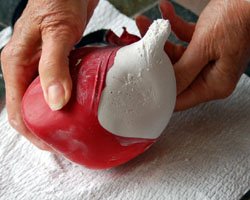
5. When it is beginning to harden, you will want to form the bird body. It may help to have someone else assist you. One person can form the tail, while you form the head. To make the head, pull the balloon stem out and up (or, any direction you choose!), while pinching at the base of the balloon stem (see first photo). To form the tail, simply pinch the back of the balloon a bit, and hold it until set (see second photo). Hold this until the plaster is set. This should only take a few minutes once the activation begin.
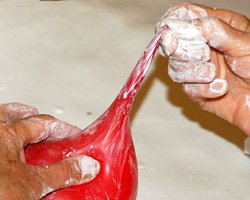
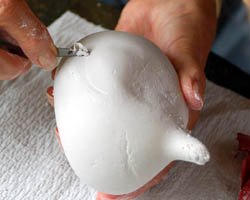
6. When you can tell it has hardened completely (about 30 minutes to an hour), you can remove the balloon. Use some scissors to clip it and pull the latex away from the bird. You can then form a wing on each side by using etching a curved line using a tool of choice (I used an exacto blade).
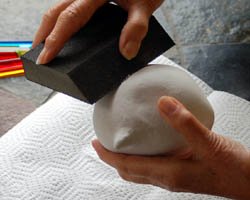
7. The plaster bird craft can be gently sanded, if needed, and then
painted to your preference. I used acrylic paints. You can then seal it with a clear acrylic spray to protect it.
Would you consider a small donation?
You will receive my craft ebook as a thank you!
Every little bit helps! If you are enjoying this site, would you consider making a small donation? I use the extra money to help with the cost of craft supplies! With any $5.00 donation or more, you will receive my 650 page ebook full of 178 craft tutorials from this site. Thank you for your consideration!
Click here to learn more about the book, and to make a donation.
Home › Spring Crafts Plaster Bird Craft
Home › Crafts for Teens › Plaster Bird Craft
Home › Crafts for Adults › Plaster Bird Craft
Home › All Occasion Crafts › Plaster Bird Craft
