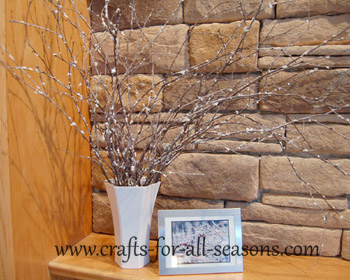
Snow Covered Branches
Winter Crafts
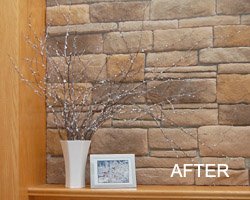
I made these snow covered branches as part of my home decor for this winter.
I just got all my holiday decorations put away and I always have trouble figuring out what to display on my mantle until Valentine's day.
I got this idea while taking a walk by my birch tree in my front yard. It always drops these long, intricate sticks. I gathered a bunch of them, killed off the bugs, and gave them an easy coat of Imitation Snow paint.
This turned out to be an easy winter craft that doubles as beautiful home decor. I could see using these branches in a variety of different ways... they can be used to create a swag, a centerpiece, or to adorn a picture frame. You can also use the snow paint on pinecones, or anything else you want to give a "winter look" to!
Materials Needed:
- Branches/twigs from Nature
- Bleach or insecticide
- Imitation Snow Paint
- Wooden craft stick (popsicle stick)
- Vase or other container
- newspapers
Instructions for Snow Covered Branches
1. Making these snow covered branches was very easy, and inexpensive too! Go outside and find some branches laying around. This gives you a good excuse to go take a walk or a hike. Pick them up from the ground, do not clip them off live trees. If you do this in the winter like I did, you probably won't have a bug problem. If you want to be careful anyhow (like I did), kill any bugs by soaking the branches in some water with a bit of bleach overnight, then rinse them and allow them to dry. I have also read that you can put the branches in a garbage bag, spray them with insecticide, and then seal the bag for a day or so. When you remove them you can give them a rinse and allow them to air dry.
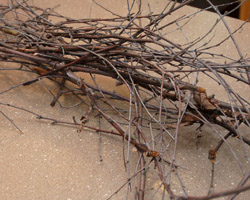
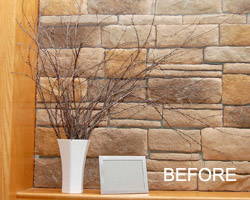
2. Next I arranged these branches in a container first, so that any trimming could be done before the painting. I also decided to paint my branches while they were in the vase, so they could dry well. You could paint all your branches while there are laying on some newspaper, however be prepared that they may stick to the paper a bit. I arranged the sticks in the vase and placed it where I wanted it on the mantle. Since I knew I was going to put it on the left side, I arranged some of the longer twigs to come out from the right of the vase. Some of my branches were naturally bent, or curved, to one side, so I arranged these to sway to the right. You can get creative with your containers. It does not have to be a vase; try a recycled Pringle can (decorate or spray paint it), shabby-chic buckets or pails, or tall bowls. You can always put some floral foam in the bottom so you have something to push and hold the sticks into, if needed.
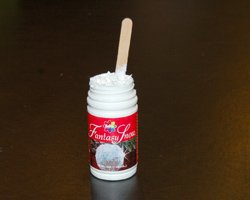
3. The imitation snow I chose to use was called "Fantasy Snow" by Delta. The 4 oz bottle cost me about $4.00 at my local craft store. There are different types of artificial snow glues, so use one of your choosing. "Fantasy Snow" by Delta was easy to apply and had tiny foam balls with the glue, with a tiny bit of glitter for sparkle. It gives a very subtle effect, which is what I was looking for. You can always add more later. Begin by placing the vase of branches over newspapers, because you will have some snow falling off. You may also want to cover the vase or container with newspaper to protect it. Then, follow the directions on the jar for applying the snow to the branches. For the Delta Fantasy Snow, I mixed up the snow with a wooden craft stick (popsicle stick). I used this same stick to apply the snow. I began at the tips of the branches, rubbing and scraping the snow off the craft stick on to the branch. It it a bit time consuming, but your effort will be well worth it.
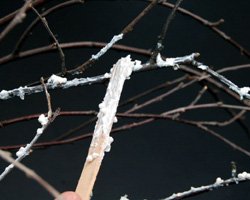
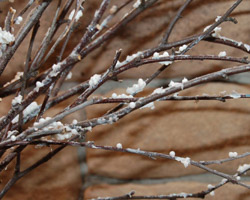
4. Allow the snow covered branches to dry overnight. The glue part dries clear, just leaving the little snowballs. If you want to add more snow, allow the arrangement to dry overnight and then add another entire layer to the snow covered branches the next day. I stopped at one coat, as I liked the subtle effect. I would love to see your photos if you make your own snow covered branches, or if you used the imitation snow for another purpose. Please submit a photo of your craft using the link at the end of this page. Please mention the type of snow you used in the craft. Many thanks back to all of you!

Would you consider a small donation?
You will receive my craft ebook as a thank you!
Every little bit helps! If you are enjoying this site, would you consider making a small donation? I use the extra money to help with the cost of craft supplies! With any $5.00 donation or more, you will receive my 650 page ebook full of 178 craft tutorials from this site. Thank you for your consideration!
Click here to learn more about the book, and to make a donation.
Home › Winter Crafts › Snow Covered Branches
Home › Crafts for Adults › Snow Covered Branches
