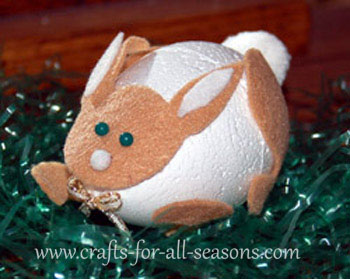
Styrofoam Egg Bunny Craft
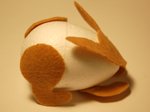
This styrofoam egg bunny craft will look adorable peeking out from a basket or sitting up on a shelf.
They really look cute when you have a few bunnies clustered together.
And they are so fast and easy to make, that it won’t be long before you have several bunnies made!
Using the patterns I provide, small pieces of felt are cut out and glued on a styrofoam egg shape. And of course, a little bunny tail is added too!
Materials Needed:
- Styrofoam egg
- Felt scrap pieces in pastel colors or light tan
- Cotton ball
- Tiny white or pink pom pom for the nose (or cut one out of felt)
- 2 color headed straight pins for the eyes (such as black, green, or blue)
- 1 small piece of ribbon for the bow
- Scissors
- Glue
Styrofoam Egg Bunny Craft Instructions
1. Click here to print the patterns for the head, arms, and legs, or draw them free hand. Then, cut out your paper patterns.
2. Pin your patterns on a sheet of felt, that is folded lengthwise. Place the straight edge of the head along this fold, and the arms and legs in the middle. This way when you cut out the felt you will get 2 arms and 2 legs, and a full bunny head.
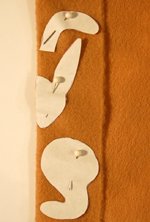
3. Cut carefully around your patterns. Then, unpin the paper patterns and do any touch up cutting with your scissors.
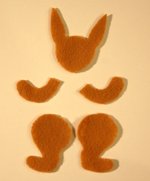
4. Glue on the bunny head on the smaller end of the egg. Push two colored straight pins in for the eyes. Cut out two small white or pink felt pieces for the inside of the ears, and glue them on. Glue on the white pom-pom for his nose.
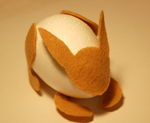
5. Glue on the front legs and back legs, as shown. Glue the cotton ball on the back of the egg for the bunny’s tail.
Would you consider a small donation?
You will receive my craft ebook as a thank you!
Every little bit helps! If you are enjoying this site, would you consider making a small donation? I use the extra money to help with the cost of craft supplies! With any $5.00 donation or more, you will receive my 650 page ebook full of 178 craft tutorials from this site. Thank you for your consideration!
Click here to learn more about the book, and to make a donation.
Home › Easter Crafts › Styrofoam Egg Bunny Craft
Home › Crafts for School Age Kids › Styrofoam Egg Bunny Craft
