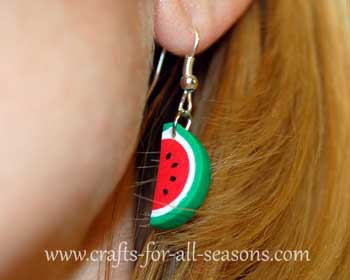
Watermelon Earrings
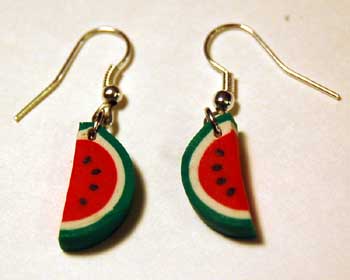
These watermelon earrings are perfect for summer! In hues of pink and red, they will go with many outfits.
The watermelon earrings are made out of polymer clay. A polymer clay watermelon cane is made, and slices from this cane become the watermelon slices.
You can make several sets of these earrings at one time, perfect for summer craft bazaars or to give away as gifts. Or, you can use the rest of the beads to make a matching necklace or bracelet.
Do not be intimidated if you have never worked with polymer clay before. All the instructions are included below. If this is your first time working with polymer clay, be sure to check out the tips and techniques article first (a new window will open).
Materials Needed:
- Red or pink polymer clay
- Green polymer clay
- White polymer clay
- pasta machine for clay, or a rolling pin or brayer
- cutting blade for polymer clay
- needle or pin
- permanent sharp tipped marker
- earring findings (either posts or dangle earrings)
- Needlenose jewerly pliers
Instructions for Watermelon Earrings
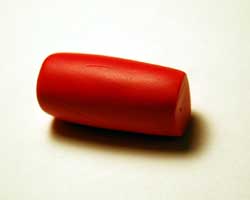
1. To begin the watermelon earrings, you must first make a polymer clay cane. A polymer clay cane is a log of clay, that usually incorporates a pattern inside it. The pattern is revealed when small slices are cut off the log, or cane. They are fun to make! This polymer clay cane is an easy one, perfect for beginners. To begin the cane, roll a small amount of red or pink clay into a log. Mine was only an inch long or so, and about ½ inch in diameter. If you want to make a lot of beads, then make the cane longer.
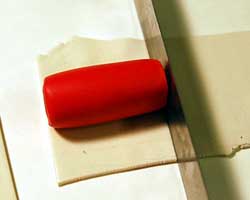
2. Next, roll out a layer of white clay using the largest setting on your pasta machine. If you do not use a pasta machine, use a rolling tool to make a flat sheet of clay. Place the red cane on top of this white clay, and trim the edges of the clay to the same size as the length of your red cane, using a blade. Then, roll the white sheet of clay around the red cane.
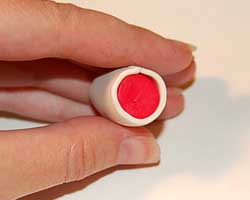
3. Repeat step 2 with a layer of green clay. The green clay will wrap around the red and white cane. This is one of the most simple canes to make, yet the effect is very realistic. The cane is done and ready for compression.
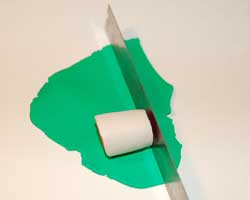
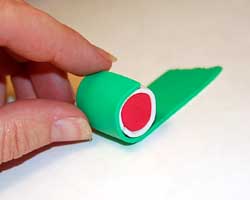
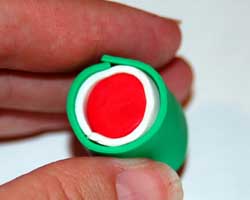
4. Gently roll the cane back and forth under your palm, applying even constant pressure. You want to reduce your cane only slightly, and eliminate any gaps between the layers of clay. Then, place the cane into the refridgerator for about 30 minutes to 1 hour to chill down. If your cane is sliced when it is warm, the colors may blend together and you may not get crisp edges (lines).
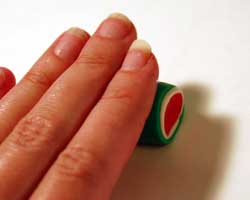
5. When the cane is cool, use your polymer clay blade (or razor blade) to cut off slices 1/8 inch thick. To make one set of earrings, you only need one slice.
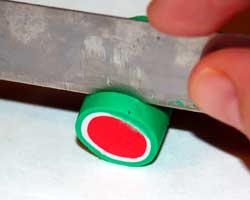
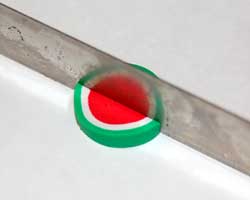
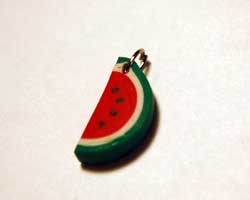
6. Cut this slice right in half to resemble the two watermelon slices. If you plan on making dangle earrings, use a pin or needle to poke a small hole at the top of the watermelon slice, where you want the earring to hang. If you are using post earring backs, there is no need to make a hole.
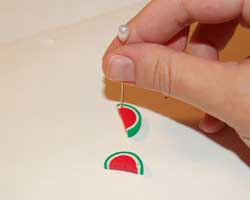
7. Bake the clay in a preheated oven for the recommended temperature and time. Allow the watermelon slices to cool completely.
8. Use a permanent sharp tipped marker to draw on little watermelon seeds. Paint the watermelon slices with a coat of sealer, if desired (or use clear fingernail polish).
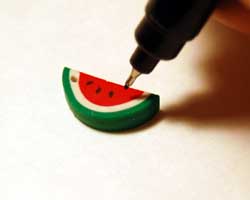
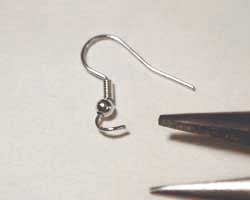
9. If you are making post earrings, simply glue on the earring backs to one side of each slice. If you want to make dangle earrings as shown here, first you need to open and thread on a jewerly loop through the tiny hole you poked. Use needlenose jewerly pliers to help open the loop. Then, open the small loop on the end of the dangle fish hook earrings with the pliers, and thread this onto the jewerly loop. Close up both loops tightly with the pliers. The watermelon earrings are now ready to wear!
Would you consider a small donation?
You will receive my craft ebook as a thank you!
Every little bit helps! If you are enjoying this site, would you consider making a small donation? I use the extra money to help with the cost of craft supplies! With any $5.00 donation or more, you will receive my 650 page ebook full of 178 craft tutorials from this site. Thank you for your consideration!
Click here to learn more about the book, and to make a donation.
Home › Summer Crafts › Watermelon Earrings
Home › All Occasion Crafts › Watermelon Earrings
Home › Polymer Clay Crafts › Watermelon Earrings
Home › Crafts for Adults › Watermelon Earrings
Home › Crafts for Teens › Watermelon Earrings
